That annoying drip, drip, drip from your tub faucet? More often than not, the culprit is a simple, worn-out washer or O-ring hiding inside the faucet handle. It’s one of the most common plumbing issues out there, and thankfully, it's a fix most people can handle themselves. The job involves shutting off the water, taking the handle apart, and swapping the old, tired rubber bits for fresh ones.
Why You Should Tackle That Drip Immediately
Let's be honest, that constant dripping isn't just a minor annoyance keeping you up at night. It's a flashing neon sign pointing to a plumbing problem that’s literally pouring your money down the drain. For anyone living in Woodstock, Acworth, or Alpharetta, ignoring it is a recipe for surprisingly high water bills and, even worse, potential water damage lurking behind your walls—a situation that might require urgent leak repair in Acworth.
Think about it. That seemingly small leak can have a huge impact. Industry data shows that the average household leak wastes nearly 10,000 gallons of water every year. That's enough to fill a backyard swimming pool and can easily tack on hundreds to your utility bills. Here in North Metro Atlanta, we see this all the time, especially in the thousands of homes built back in the 70s and 80s—which now account for over 40% of our local housing. You can dive deeper into the real costs by checking out this plumbing industry report on household leaks.
Getting Started The Right Way
Before you grab a wrench and dive in, hold on. A few key preparations can make the difference between a quick, successful fix and an urgent call to an emergency plumber in Marietta. Rushing the prep is a classic rookie mistake.
To get set up for success, it’s always a good idea to run through a quick checklist.
Your Pre-Repair Checklist for a Dripping Faucet
| Item or Action | Why It's Important | Insider Tip |
|---|---|---|
| Shut Off the Water | This is the absolute first step. Skipping it guarantees a flood. | After shutting off the main valve, open the tub faucet fully to drain any leftover water from the pipes. This prevents a surprise shower. |
| Protect Your Tub | Tools are heavy and metal. Your tub's porcelain or acrylic finish is not. | An old, thick towel works great. It not only prevents scratches but also muffles the sound of a dropped tool, saving you a heart attack. |
| Plug the Drain | Small screws and parts seem to have a magnetic attraction to the drain opening. | A rag or a drain stopper is a must. Taping over the drain with painter's tape is another pro-move that works in a pinch. |
| Gather Basic Tools | Making multiple trips to the garage or hardware store is frustrating and wastes time. | Have a Phillips and flat-head screwdriver, an Allen wrench set, and adjustable pliers ready. A flashlight can also be a lifesaver. |
Taking a few minutes to get organized like this really sets the stage for a smooth repair.
A little preparation goes a long way. It helps you avoid those common DIY blunders that turn a simple washer replacement into a much bigger headache—like a snapped pipe or a stripped faucet handle that's stuck for good.
This is especially true if you're working on older fixtures, which you'll find all over Cherokee and Cobb County. You’re almost guaranteed to run into corroded screws and stubborn parts. By approaching the job methodically, you’ll build your confidence and finally get that annoying drip silenced for good.
Figuring Out Your Faucet Type Is the First Step
Before you can silence that drip… drip… drip…, you've got to play detective for a minute. The single most important thing you can do is figure out exactly what type of faucet you have. This one step dictates the parts you'll need and the repair strategy you'll follow. Trust me, getting this wrong is how a quick Saturday morning fix turns into a week-long headache and a search for a plumber "near me".
Most homes around here in North Metro Atlanta will have one of four common tub faucets. The best way to tell them apart is by looking at the handles and feeling how they move.
This simple chart walks you through the initial game plan for any dripping faucet.
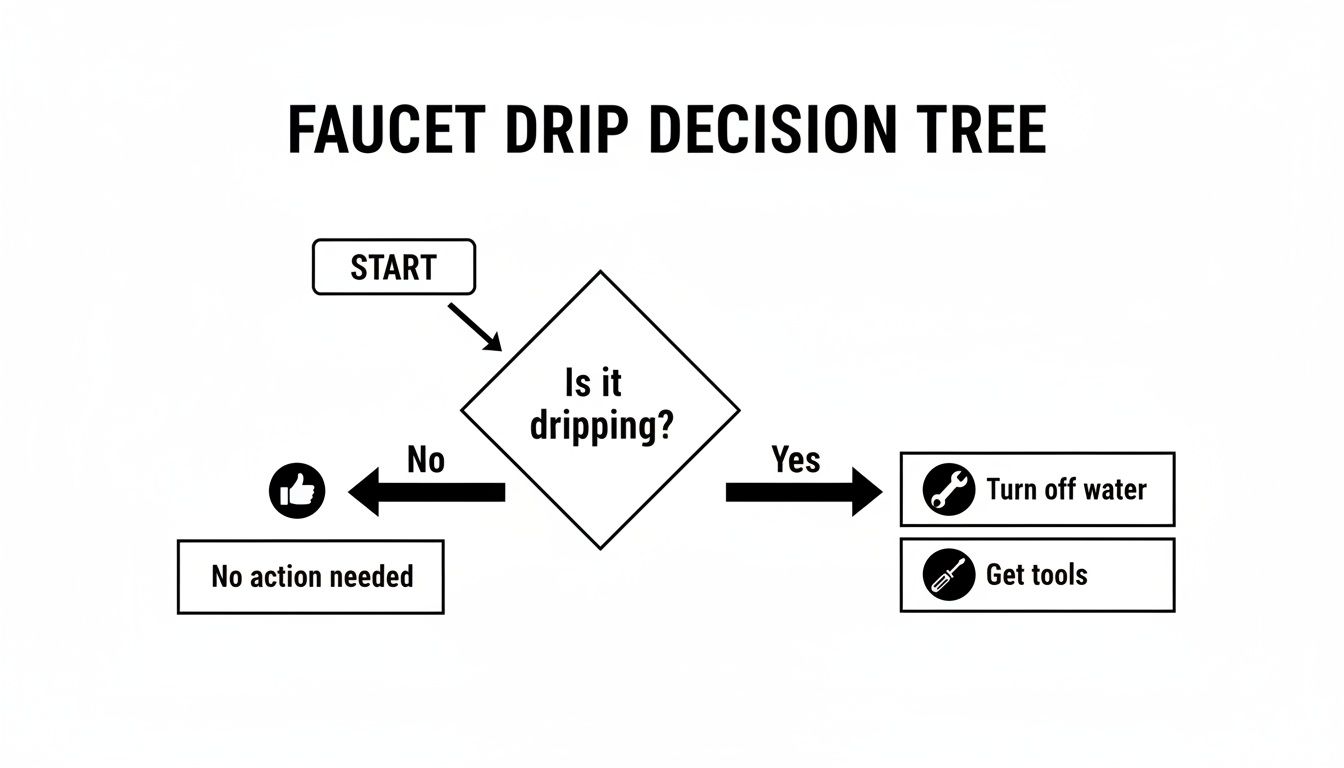
As you can see, confirming the drip, shutting off the water supply, and getting your tools ready are the universal first moves before you even think about taking that faucet apart.
The Four Common Faucet Types
-
Compression Faucets: Think of the classic two-handle faucet, one for hot and one for cold. You have to physically tighten them down to stop the water flow. If you feel the handle get tighter until it comes to a firm stop, chances are you've got a compression faucet. These are the old-school standard.
-
Cartridge Faucets: These can come with either one or two handles, but the key is how they feel. The handle action is incredibly smooth—there's no tightening or cranking down. You just turn it, and the water is on or off.
-
Ball Faucets: You can almost always spot a ball faucet by its single handle that sits on a rounded, dome-shaped cap. The handle pivots on a metal or plastic ball inside the faucet body, giving it a wide range of motion up, down, left, and right.
-
Ceramic Disc Faucets: These are generally newer, single-handle models that are built to last. They feel solid, have a very modern look (often with a thick, cylindrical body), and the handle moves with an almost frictionless glide.
I can't stress this enough: taking a moment to correctly identify your faucet is the difference between a successful 30-minute repair and a frustrating weekend project. Each one has a completely different heart—from simple rubber washers in a compression faucet to a self-contained unit in a cartridge model.
If you're staring at your faucet and it doesn't seem to match any of these, or you can't find the right parts at hardware stores in Roswell or Cumming, you might have an older or less common model on your hands. When you're not sure, a quick call to a 24 hour plumber in Cumming can save you from buying the wrong parts or, worse, causing more damage.
A Hands-On Guide to Fixing Your Two-Handle Faucet

Alright, so you've confirmed you have a classic two-handle faucet. This is the style you'll find in countless homes from Roswell to Johns Creek, and honestly, it’s a great one to start your DIY plumbing journey on. The whole process is pretty straightforward and doesn't call for a truckload of expensive, specialized tools.
The best part? That annoying drip is almost always caused by a few small, cheap rubber parts that have simply worn out. A little patience is all it takes to get this done.
Getting Inside the Faucet
First, we need to get to the guts of the faucet. The handle is usually held on by a single screw, which is almost always hiding under a little decorative cap—you know, the one with the "H" or "C" on it. A small flat-head screwdriver is perfect for gently prying that cap off.
Once the cap is gone, you’ll see the screw. Grab a Phillips head screwdriver and take it out. The handle should pull straight up and off, but don't be surprised if it puts up a fight. A little wiggling usually does the trick, especially if there's some mineral buildup holding it in place.
Underneath the handle is the heart of the operation: the valve stem or cartridge. This is what actually controls the water, and it's almost certainly where your leak is coming from.
Swapping Out the Worn Parts
Now for the main event. You'll need an adjustable wrench or some channel-lock pliers to unscrew the packing nut that's holding the stem in place. Just turn it counter-clockwise to loosen it, and then you should be able to pull the entire stem assembly right out.
Take a good look at the stem you just removed. You’ll find a few key rubber pieces:
- O-rings: These are the little rubber circles that create a seal around the stem body.
- Seat Washer: This is a flat rubber washer at the very bottom, typically held on by a small brass screw.
Nine times out of ten, that seat washer is the real troublemaker. After years of being squished against the valve seat to stop the water, it just wears out. Unscrew the old one, put on a new one, and it's a good idea to replace the O-rings while you have everything apart. A little dab of plumber’s grease on the new parts helps them seal perfectly and makes the next repair that much easier.
Here’s a pro tip: Before you put the stem back in, look inside the faucet body. You'll see a small brass opening called the valve seat. If it feels rough or looks pitted, it can chew up your new washer and bring that drip right back. A simple tool called a seat wrench can smooth it out, giving you a much longer-lasting fix.
In two-handle tub faucets—which are super common in Marietta's mid-century homes (over 35% built before 1990)—worn O-rings or seats are the cause of 80% of all drips. While the DIY success rate is around 65%, a surprising 20% of attempts actually make things worse, sometimes leading to stripped threads that require a full replacement. You can dig into more stats in this report on common plumbing repairs.
Once you've replaced the parts and cleaned up the valve seat, just put everything back together in the reverse order you took it apart. Go easy on the tightening—snug is all you need. If a part feels completely stuck or the drip is still there after your hard work, it could point to a bigger problem. Don’t risk it; call an emergency plumber in Canton to avoid turning a small drip into a major burst pipe repair.
Tackling a Leak in a Single-Handle Faucet
If you've got a single-handle faucet in your Cumming or Alpharetta home, you know they offer a clean, modern look. But when that drip…drip…drip starts, fixing it is a different ballgame than with older two-handle models. These faucets use a single internal part—a ball, a cartridge, or a ceramic disc—to mix hot and cold water.
Unlike a simple washer swap in a compression faucet, this job involves replacing the faucet's entire core component. The good news? These parts are usually self-contained units, which can make the repair surprisingly straightforward once you know what you're doing. The first hurdle, though, is always the same: finding that pesky little set screw.
Getting Inside the Faucet
On almost every single-lever faucet, the handle is secured by a tiny set screw. Manufacturers love to hide these things, so you might have to do some searching. Check at the very base of the handle, near the decorative plate, or look for a small decorative cap you can pop off.
Once you find it, you’ll probably need a small Allen wrench. A few counter-clockwise turns should be enough to loosen the handle. Don't take the screw all the way out, just loosen it. Then, you can lift the handle straight up and off.
With the handle gone, you’ll be looking at the top of the valve. If you have a ball or cartridge faucet, there's likely a dome-shaped cap or a retaining clip in your way. I always recommend wrapping a rag around the cap before using channel-lock pliers to protect the finish. If it's a cartridge type, you might see a small U-shaped clip that you can gently pry out with a screwdriver.
After that, you've got a clear shot at the part causing the leak. Before you pull anything else out, snap a quick picture with your phone. It’s a simple trick, but it can save you a huge headache when it's time to put everything back together.
We get a lot of calls where a homeowner has tried to force a stuck part. If a cap or clip won't budge, it's usually because of mineral buildup from our hard water here in North Fulton and Forsyth County. A little penetrating oil or a few gentle taps can often work it loose. Trying to brute-force it can break the faucet and turn a simple fix into a call for a main water line repair in Johns Creek.
Swapping Out the Guts
Now for the main event. The next step depends entirely on which type of faucet you have. These internal kits aren't interchangeable, so make sure you've got the right one before you start.
-
Ball Faucets: Your repair kit will have a new ball (usually plastic or steel), a couple of tiny springs, and rubber seats. Once you lift the old ball out, use a small screwdriver or pick to fish out the old springs and seats from inside the faucet body. Drop the new ones in, place the new ball on top—making sure to line up the notch correctly—and you're ready to reassemble.
-
Cartridge Faucets: This is usually the easiest one. The whole cartridge just lifts straight out. Slide the new one in, making sure it's oriented the same way as the old one. It’s a one-and-done replacement, which is why plumbers don't mind working on these.
-
Ceramic Disc Faucets: These things are built to last, but the seals can wear out. You’ll need to remove some neoprene seals and then the disc cartridge. The most important part of this repair is to thoroughly clean out any gunk or sediment from inside the faucet body before putting in the new disc and seals.
Once you’ve replaced the worn-out parts, just put everything back together in the reverse order you took it apart. Turn the water supply back on slowly and check for leaks.
If the drip is gone, congratulations! But if it’s still there, or if a part breaks or is badly corroded during the process, it's time to stop. Pushing your luck could turn a small drip into a full-blown burst pipe repair situation. That's the perfect time to give a 24 hour plumber in Roswell a call for some expert help.
When a Drip Signals a Deeper Problem
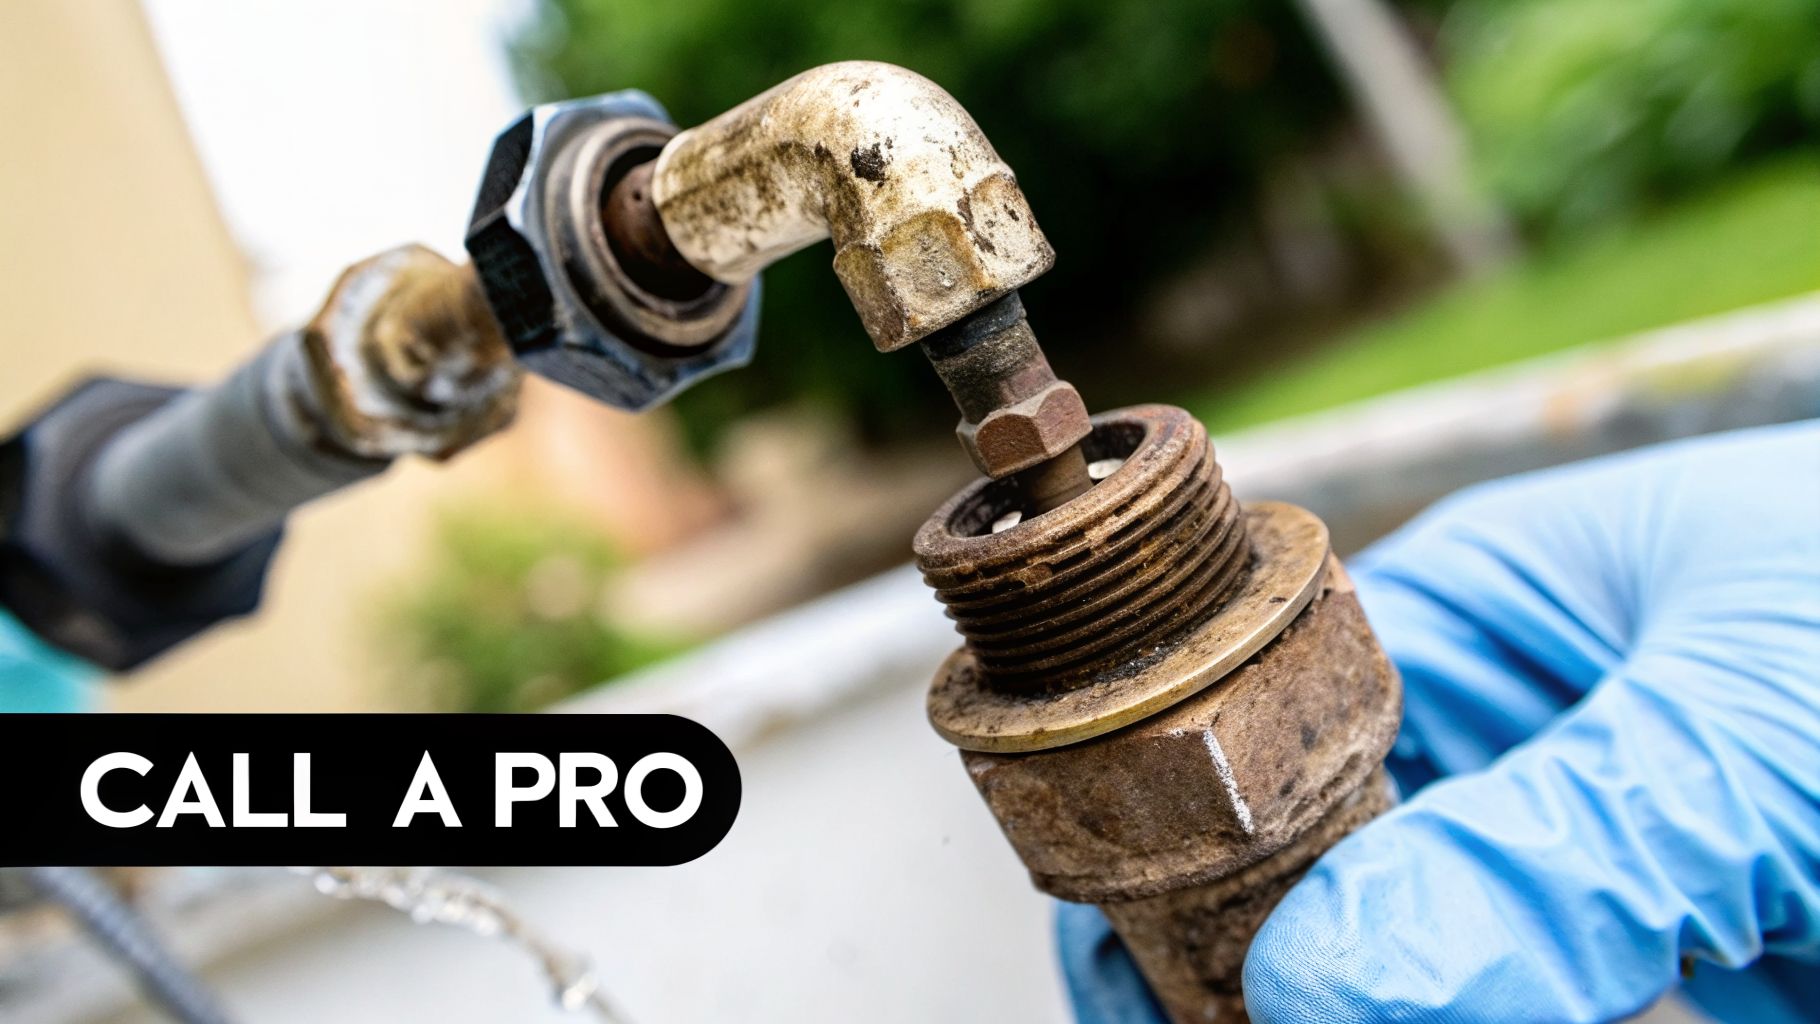
So, you did everything by the book. You shut off the water, swapped out the old parts, and carefully reassembled the faucet. But that maddening drip… drip… drip is back. It’s a moment every DIYer dreads, and it’s usually a sign that you're dealing with something more than a simple worn-out washer.
When a leak just won't quit, it often means the real issue is hiding deeper inside the faucet itself or, worse, in the plumbing behind your shower wall. For folks in older homes around Woodstock or Canton, these hidden problems can snowball fast. Sometimes, knowing when to put down the wrench is the smartest move you can make, especially if it leads to needing sewer repair in Woodstock.
Warning Signs You Can't Ignore
Look, some faucets just can't be saved with a quick parts swap. After years of use, the internal components can get so corroded or damaged that a new washer or O-ring won't make a difference. This is where a simple fix turns into a risky gamble.
Keep an eye out for these red flags that scream "Call a pro":
- A Severely Corroded Valve Seat: This is the little brass ring the washer presses against to stop the water. If it’s deeply pitted or cracked from mineral buildup, a new washer has nothing to seal against. It’s like trying to put a cap on a jagged bottle.
- Stripped Threads: If you can't get the faucet stem or packing nut to tighten down properly, the threads are likely stripped. This often happens when people try to over-tighten a leaky connection, accidentally destroying it in the process.
- Visible Cracks in the Faucet Body: A tiny, hairline crack, often hidden from view under the handle, can be the source of a persistent leak that no internal repair will ever solve. This means the whole fixture is shot and may require a complete faucet and water line replacement.
If that stubborn drip has already caused serious water damage, you might be looking at a bigger project. Issues that have compromised drywall or flooring may require complete bathroom reconstruction services to fix correctly.
I can't tell you how many times I've seen a DIY fix go wrong. Someone tries to force a stuck handle or puts all their weight into tightening a nut, and that pressure snaps an old, corroded pipe behind the wall. Their call for a simple leak repair turns into a frantic call for an emergency plumber in Alpharetta to stop a full-blown flood.
Protecting Your Home from Costly Damage
The line between a satisfying DIY win and a plumbing nightmare is thinner than you think. That drip might just be the tip of the iceberg, hinting at deteriorating pipes or dangerously high water pressure in your whole house. Pushing your luck with repairs you're not comfortable with can lead to thousands in water damage, mold remediation, and structural repairs.
Don't risk it. Calling a certified Master Plumber is the smart play. We can diagnose the root cause in minutes—whether it’s a faulty valve, a symptom of low water pressure, or a bigger problem that needs a main water line repair. We have the right tools and, more importantly, the experience to fix it right the first time, keeping your home safe and dry.
Got More Questions About That Dripping Faucet?
It's pretty common to fix one thing only to have another question pop up. We get a lot of the same queries from homeowners around Acworth and Canton after they've tackled a faucet repair. Let's walk through some of the most frequent ones we hear.
I Replaced the Washer, But It’s Still Dripping! What Gives?
Ah, the classic post-repair drip. It’s incredibly frustrating, but there's a simple explanation. If a new washer didn't solve the problem, you're almost certainly dealing with a worn-out valve seat.
Think of the valve seat as the landing pad for the washer. It's a small brass ring that the washer presses against to shut off the water. Over time, hard water and daily use can cause that smooth surface to become pitted and corroded. A new washer can't form a tight seal against a damaged surface, so the drip continues. You can try to re-grind the surface with a special tool called a seat wrench, but if the damage is bad, the whole faucet likely needs replacing. That's a job best left to a pro to avoid any "oops" moments with the plumbing behind your wall.
Should I Bother Repairing This Old Faucet or Just Replace It?
This is a judgment call, and it usually comes down to the faucet's age and overall health.
-
Go for a repair if: The faucet is under 15 years old, and you can easily find the parts you need at local stores in Marietta or Roswell. If it’s just a simple washer or O-ring, a quick, cheap repair makes the most sense.
-
Consider a replacement if: It’s pushing 20 years or more, the finish is a corroded mess, or this isn't the first time you've had to fix it. A new faucet not only solves the drip for good but can also be more water-efficient and give your bathroom an updated look. Plus, if you're noticing other strange things like a sewage smell or low water pressure elsewhere, the drip might just be one symptom of a bigger problem that requires professional drain cleaning in Marietta.
That little drip-drip-drip might seem harmless, but a faucet leaking just once per second wastes over 3,000 gallons of water in a single year. For anyone in North Metro Atlanta, that's a lot of money literally going down the drain.
Can I Just Use Parts from a Sink Faucet?
It’s a tempting shortcut, but definitely don't do it. While an O-ring might look the same, the internal parts of a tub faucet are built differently. They're designed to handle a much higher water flow, so the cartridges and stems are beefier. Using a part meant for a sink is a surefire way to end up with another leak, probably sooner rather than later. Your best bet is to always take the old part with you to the hardware store to get a perfect match.
If your DIY attempt didn't quite hit the mark, or if you think there’s a bigger issue at play, it's better to be safe than sorry. Don’t let a small leak escalate into a major headache. The team at JMJ Plumbing has seen it all and can provide quick, dependable solutions. For professional help with leak repair, sewer backup, or any plumbing emergency in North Metro Atlanta, schedule your appointment with JMJ Plumbing today.