Your water heater works tirelessly behind the scenes, providing the hot water essential for daily life. But what happens when you suddenly have no hot water? For homeowners in North Metro Atlanta, from Woodstock to Alpharetta, a burst tank or an unexpected cold shower isn't just an inconvenience. It can quickly escalate into an emergency that leads to costly water damage, potential sewer backups, and frantic searches for a "24-hour plumber in Roswell."
Ignoring your water heater is a risk that can have significant consequences. Symptoms that seem minor, like low water pressure, strange banging noises, or even a faint sewage smell near the unit, can be early warning signs of bigger problems. These issues are often traced back to a neglected water heater, which can strain your entire plumbing system and even impact your main water line. If you're facing slow drains or a clogged toilet that won't flush, the root cause could be connected. To truly protect your home and finances, it's crucial to understand the fundamental difference between effective preventive vs. reactive maintenance. Taking proactive steps now is far less expensive and stressful than dealing with an emergency burst pipe repair in Marietta or a full water heater replacement in an emergency.
This guide provides 8 essential water heater maintenance tips designed for homeowners in communities like Marietta, Cumming, and Johns Creek. We’ll cover everything from simple DIY checks to knowing exactly when to call a professional for services like drain cleaning or leak repair. Following these straightforward steps will help you extend your unit's lifespan, improve its efficiency, prevent plumbing disasters, and keep your home running smoothly.
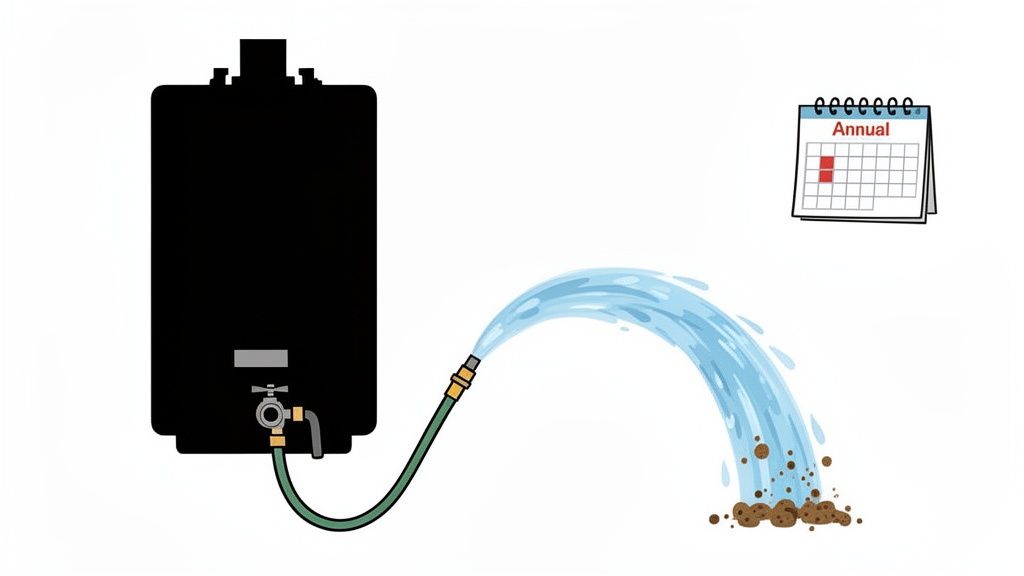
1. Flush Your Water Heater Tank Annually
Over time, your water heater tank accumulates sediment and mineral buildup, especially in areas with hard water like much of North Metro Atlanta. This chalky, sandy debris settles at the bottom of the tank, creating a barrier between the heating element and the water. This forces your unit to work harder, reducing efficiency, increasing energy bills, and accelerating wear and tear. Flushing your tank once a year is one of the most effective water heater maintenance tips to combat this problem. The process involves completely draining the tank to clear out these deposits and refilling it with fresh water.
Why Annual Flushing is Essential
The benefits of a consistent flushing schedule are significant. By removing the insulating layer of sediment, you restore your water heater's direct heating efficiency. This not only lowers your monthly energy costs but also extends the unit's operational lifespan. Homeowners in Marietta and Woodstock who follow this simple maintenance task often see their water heaters last 15 years or more, far beyond the typical 8 to 10-year average for neglected units. For businesses, like commercial properties in Canton, regular flushing prevents unexpected failures and ensures a consistent hot water supply for tenants, which is critical for daily operations.
Key Insight: Ignoring sediment buildup is a leading cause of premature water heater failure. The sediment can corrode the bottom of the tank, leading to leaks and the need for a costly emergency water heater replacement in Woodstock. If you notice symptoms like low water pressure or see water in your yard near the unit, it might be too late for simple maintenance and time to call an emergency plumber in Cherokee County.
How to Flush Your Water Heater
While it is a manageable DIY task for some, it requires careful steps to ensure safety and effectiveness. If you're ever unsure, calling a professional from JMJ Plumbing for water heater service in Forsyth County is the safest bet.
- Preparation: First, turn off the power supply at your circuit breaker (for electric heaters) or switch the gas control to "PILOT" (for gas heaters). Then, shut off the cold water supply valve to the tank.
- Safety First: Open a hot water faucet somewhere in your house, like a kitchen or bathroom sink. This relieves pressure inside the tank and prevents a vacuum from forming.
- Drain the Tank: Attach a standard garden hose to the drain valve located at the bottom of the water heater. Run the other end of the hose to a floor drain or outside, away from your home's foundation. Open the drain valve to begin emptying the tank.
- Rinse and Refill: Once empty, briefly open the cold water supply valve a few times to stir up and flush out any remaining sediment at the bottom. After the water runs clear, close the drain valve, disconnect the hose, and fully open the cold water supply to refill the tank. Leave the hot water faucet on until water flows steadily from it, ensuring all air is out of the system. Finally, restore power or turn the gas back on.
For homeowners in Acworth, Canton, or other areas in Cobb County with particularly hard water, we recommend flushing every six months for the best results. If you find the process daunting or the drain valve is stuck, don't force it. Contact JMJ Plumbing for fast, reliable service.
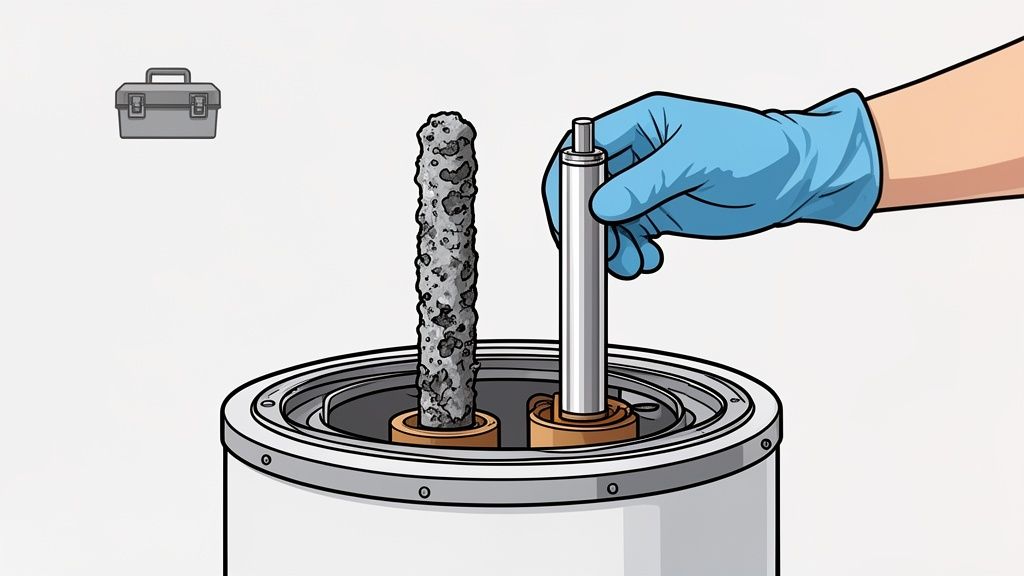
2. Check and Replace the Anode Rod Every 3-5 Years
Hidden inside your water heater tank is a component that works silently to prevent rust and corrosion: the anode rod. This rod is made of a more reactive metal, like magnesium or aluminum, and acts as a "sacrificial" element. Through an electrochemical process, the anode rod corrodes and deteriorates instead of the steel tank lining, effectively taking the hit to protect your unit. This simple but vital part is a key player in water heater longevity, and inspecting and replacing it is one of the most cost-effective water heater maintenance tips you can follow.
Why Anode Rod Inspection is Essential
The anode rod has a finite lifespan. Once it completely corrodes away, your tank's inner lining becomes the next target for corrosion, leading to rust, leaks, and eventual failure. A simple replacement can add years to your water heater's life. For instance, many of our JMJ Plumbing customers in Roswell who are diligent about replacing anode rods every four years have kept their original water heaters running well past the 15-year mark. The frequency of replacement depends heavily on water quality. Hard well water in areas like Acworth can dissolve an anode rod in as little as two to three years, while homeowners in Johns Creek with water softeners may find their rods last six years or more.
Key Insight: A corroded anode rod is often the root cause of premature tank failure. If your hot water smells like rotten eggs or appears rusty, it's a strong sign the rod is gone and your tank is at risk. Addressing this early prevents a costly emergency water heater replacement in Woodstock or Marietta and avoids a frantic search for an "emergency plumber near me."
How to Check and Replace Your Anode Rod
Replacing an anode rod can be tricky due to its location and the torque required to remove it. If you're not comfortable with the process or the rod is stuck, it's best to call a professional plumber for help in North Fulton.
- Preparation: Follow the same initial steps as flushing: turn off the power or gas and shut off the cold water supply valve. Drain a few gallons of water from the tank to lower the water level below the top.
- Locate and Loosen: The anode rod is a hex-head bolt typically located on top of the water heater. You will likely need a 1-1/16-inch socket and a long breaker bar to loosen it, as it's often very tight from the factory.
- Inspect and Replace: Once loosened, unscrew and lift the rod out. If it's pencil-thin, covered in calcium buildup, or has large sections of the core wire exposed, it needs to be replaced. To install the new one, wrap the threads with Teflon tape and screw it into place, tightening securely.
- Final Steps: Turn the cold water supply back on to refill the tank. Open a nearby hot water faucet to bleed air out of the system. Once water flows steadily, you can safely restore power or relight the pilot for your gas heater.
For business owners in Cumming, tracking anode rod replacements as part of a regular maintenance schedule helps avoid unexpected failures and ensures consistent hot water. If you notice signs of a problem or need a routine inspection, contact JMJ Plumbing for fast, reliable service across North Metro Atlanta.
3. Monitor and Maintain Proper Temperature Settings (120°F)
Setting your water heater to the optimal temperature of 120°F (49°C) is a crucial step that balances comfort, energy efficiency, and safety. Many manufacturers ship new units with a default setting of 140°F, which is often unnecessarily high. This elevated temperature not only wastes significant energy keeping water that hot 24/7 but also dramatically increases the risk of scalding, especially for children and the elderly. Lowering the temperature to the U.S. Department of Energy's recommended 120°F can reduce your water heating costs by 6-10% annually while still delivering plenty of hot water for daily needs. This simple adjustment is one of the most impactful water heater maintenance tips you can perform.
Why 120°F is the Ideal Temperature
The benefits of maintaining this specific temperature are substantial. Beyond the immediate energy savings, which Marietta homeowners have seen reach approximately $300 per year, it is a critical safety measure. Water at 140°F can cause a third-degree burn in just five seconds. In contrast, it takes about five minutes of exposure to 120°F water to cause a similar injury, giving people ample time to react. For families in Cherokee County or senior living communities in North Fulton, setting this standard is a practical way to prevent accidents without sacrificing comfort. Furthermore, commercial properties in Alpharetta have noted a 7-8% reduction in annual water heating costs, a significant operational saving.
Key Insight: A higher temperature doesn't just cost more; it accelerates mineral buildup and corrosion inside your tank. This added stress can lead to premature failure, turning a preventable issue into an emergency call for a water heater replacement in Woodstock or Roswell. This can also strain other parts of your plumbing, potentially contributing to the need for water line replacement over time.
How to Adjust and Verify Your Water Heater's Temperature
Checking and adjusting your water heater's thermostat is a straightforward task. However, the dial on the unit is often an estimate, so it's best to verify the actual temperature at the tap. If you have any doubts, the experts at JMJ Plumbing can ensure it’s set correctly and safely during a service call for anything from leak repair in Acworth to drain cleaning in Canton.
- Find the Thermostat: On a gas heater, the temperature dial is usually a visible knob on the front of the unit. On an electric heater, you'll likely find two thermostats behind screw-on panels on the side of the tank; remember to turn off the power at the circuit breaker first.
- Test the Current Temperature: Turn on a hot water tap closest to the heater and let it run for a minute. Use a meat or cooking thermometer to measure the water temperature. This gives you a true reading.
- Make Small Adjustments: Turn the dial to the 120°F mark or a "low" setting. If you have two thermostats on an electric model, set both to the same temperature to prevent one element from overworking.
- Verify and Finalize: Wait a few hours for the water to adjust to the new setting, then re-test the temperature at the tap. If you have a dishwasher without a built-in booster heater, 120°F is generally sufficient for modern detergents. For households in Acworth or Cumming with water softeners, this temperature is highly effective.
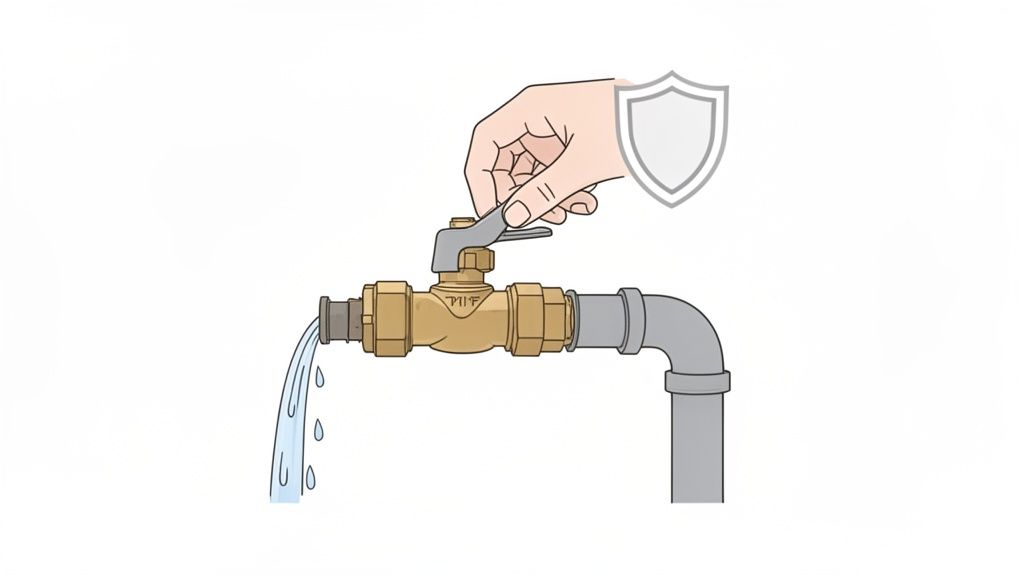
4. Inspect and Test the Pressure Relief Valve Annually
Often overlooked, the temperature and pressure relief (TPR) valve is your water heater's most critical safety feature. Its sole purpose is to automatically release excess pressure or temperature from inside the tank, preventing a potentially catastrophic failure. If this valve malfunctions, pressure can build to dangerous levels, risking a tank rupture or explosion. Annual testing is a mandatory safety check that confirms the valve can open and close correctly, protecting your home and family. This simple step is one of the most important water heater maintenance tips you can perform.
Why Annual TPR Valve Testing is Essential
A functional TPR valve is non-negotiable for safe water heater operation, a standard mandated by the International Plumbing Code (IPC) and ASME. For a Roswell family, a continuously dripping TPR valve led to minor water damage but alerted them to a failing component that needed immediate replacement. In a more serious case, a JMJ Plumbing technician performing routine maintenance for a Marietta homeowner discovered a completely seized valve; a simple test prevented a potential tank explosion. This annual check is not just about preventing disaster; some home insurance policies in areas like Acworth now require documented proof of TPR valve testing to maintain coverage.
Key Insight: Never ignore a dripping or continuously running TPR valve. While it could mean the valve itself is faulty, it can also indicate dangerously high pressure or temperature inside your tank, a symptom that can precede a burst pipe. If the valve is discharging water without you testing it, shut off the power or gas to the unit and call an emergency plumber in Alpharetta immediately.
How to Test Your TPR Valve
Testing the TPR valve is straightforward, but it must be done with caution. If you are not comfortable or if the valve appears corroded or stuck, it's best to contact a professional from JMJ Plumbing for assistance anywhere in Metro Atlanta.
- Preparation: Before you begin, place a bucket under the discharge pipe connected to the TPR valve to catch the water. The pipe should point downwards toward the floor and be free of any obstructions.
- Safety First: The water released will be extremely hot. Keep your hands and body clear of the discharge pipe opening to avoid serious burns.
- Test the Valve: Gently lift the test lever on the valve. You should hear a rush of air and see hot water flow out of the discharge pipe. This confirms the valve is not stuck.
- Check the Seal: Release the lever. It should snap back into its original position, and the water flow should stop completely. If the valve continues to drip or leak after the test, the seal is worn out, and the valve must be replaced. Do not attempt to plug the discharge line; this creates a severe safety hazard.
For commercial properties in Johns Creek or homeowners in Canton, documenting these annual tests provides a valuable maintenance record. If you hear hissing sounds or see water anywhere near the valve, it's a sign you need professional leak repair service right away.
5. Inspect Water Connections and Drain Valve for Leaks
Even the smallest, most insignificant-looking drip from your water heater can escalate into a major disaster. Regular inspection of all water connections, including the inlet and outlet pipes, drain valve, and various fittings, is a simple but critical maintenance tip to prevent costly water damage. Over time, corrosion, mineral deposits common in North Metro Atlanta’s water, and simple wear and tear can compromise these connection points. A slow, unnoticed leak can cause thousands of dollars in damage, promote mold growth, and deteriorate your home's structural integrity, potentially leading to a search for "main water line repair near me."
Why Monthly Leak Inspection is Non-Negotiable
A slow leak from a water heater connection is one of the most deceptive and destructive problems a homeowner can face. It often starts as a small wet spot or a line of corrosion that is easy to overlook. However, this seemingly minor issue can saturate drywall, warp flooring, and rot the subfloor beneath the unit. For instance, a JMJ Plumbing customer in Cumming discovered a small leak at their water heater's inlet connection during a routine check, a discovery that prevented an estimated $5,000 in potential water damage to their finished basement. Similarly, a Marietta family had their homeowner's insurance claim denied because the water damage from an undetected leak was deemed preventable through basic maintenance.
Key Insight: A tiny, persistent drip is not just a nuisance; it’s a warning sign. Ignoring a small water stain or a bit of rust around a connection can lead to catastrophic failure. An Acworth homeowner who ignored a small leak needed an emergency water line replacement costing over $12,000 to repair foundation damage.
How to Inspect for Leaks
Performing a visual inspection takes only a few minutes each month but provides invaluable peace of mind. If you ever find a leak or are unsure about what you see, the safest action is to call a professional from JMJ Plumbing for an expert evaluation and a fast leak repair in Cobb County.
- Perform a Visual Check: Once a month, use a flashlight to carefully inspect the area around your water heater. Look for any signs of moisture, including active drips, water stains on the tank or floor, pooling water, rust, or white, chalky mineral deposits (efflorescence) on pipes and fittings.
- Wipe and Wait: If you see a suspicious damp spot, wipe it completely dry with a cloth. Check back in a few hours or the next day to see if the moisture has returned. You can also place a dry paper towel under the connections overnight to catch subtle drips.
- Check Key Points: Pay close attention to where the cold water inlet and hot water outlet pipes connect to the top of the tank. Also, ensure the drain valve at the bottom is fully closed and not dripping.
- Don’t Force It: If you notice a drip from the drain valve, you can try to tighten the knob gently (a quarter-turn clockwise). If it continues to leak or is stuck, do not apply excessive force, as the plastic valve can break and cause a flood. This is a clear sign you need a 24-hour plumber.
For homeowners in Roswell and other areas with hard water, more frequent checks are a good idea. Catching a problem early transforms a potential emergency into a simple, affordable repair.
6. Insulate the Water Heater Tank and Hot Water Pipes
A surprising amount of energy is lost simply keeping the water in your tank hot and delivering it to your faucet. This "standby heat loss" forces your water heater to cycle on more frequently, driving up utility bills. Insulating the tank and the first several feet of hot water pipes is a simple, effective water heater maintenance tip that directly reduces this energy waste. For homeowners in North Metro Atlanta, where temperatures fluctuate seasonally, this small upgrade improves efficiency year-round and provides an excellent return on investment. An uninsulated tank can lose 10-15% of its heat, but a simple insulation blanket can cut that loss by up to 45%.
Why Insulation is Essential
The benefits of proper insulation extend beyond just energy savings. By wrapping your tank and pipes, you reduce standby heat loss, meaning your heater runs less often to maintain its set temperature. This not only lowers your monthly energy bills but also reduces wear and tear on the unit's components, contributing to a longer lifespan. For instance, Roswell homeowners have reported saving $18-$35 per year on average after insulating. This measure also provides a crucial safety benefit by lowering the tank's exterior surface temperature. One Acworth homeowner noted their tank's surface dropped from a scalding 130°F to a much safer 95°F after installing a blanket.
Key Insight: Insulating hot water pipes in unconditioned spaces like garages, basements, or crawl spaces is critical for preventing frozen and burst pipes during cold snaps. A JMJ Plumbing customer in Alpharetta avoided a costly emergency burst pipe repair by insulating lines in their unheated garage before winter.
How to Insulate Your Water Heater and Pipes
Installing a water heater blanket and pipe sleeves is a manageable project for many homeowners, but always check your unit’s warranty first, as some manufacturers require professional installation. If you're ever in doubt, the experts at JMJ Plumbing can ensure it's done correctly.
- Preparation: Purchase a pre-cut water heater insulation blanket that matches your tank's size (gas or electric). For pipes, use adhesive-backed foam sleeves with at least a 1/2-inch thickness for the best results.
- Safety First: When working around a gas water heater, never cover the top, the thermostat, the pressure relief valve, or the burner access panel. Proper airflow is essential for safe operation. For electric models, be careful not to cover the thermostat or heating element access panels.
- Install the Blanket: Wrap the blanket around the tank and secure it with the provided tape. Carefully cut out openings for the thermostat, drain valve, and pressure relief valve. Ensure nothing is blocked or obstructed.
- Wrap the Pipes: Measure and cut the foam pipe insulation to fit. Focus on wrapping at least the first six feet of hot and cold water pipes connected to the tank, as this is where the most significant heat transfer occurs. If pipes run through unheated areas, insulate their entire length. Inspect your work annually and replace any damaged sections. Addressing any water issues promptly is also critical; for help on this, consider this article on what to do about heater leaking water.
For commercial properties in Cumming or Johns Creek, comprehensive insulation can significantly reduce operating costs and prevent tenant complaints about inconsistent hot water.
7. Schedule Professional Annual Maintenance Inspections
While DIY maintenance is crucial, nothing replaces the trained eye of a professional. Scheduling an annual maintenance inspection with a certified plumber provides a complete evaluation of all your water heater's components, identifying potential problems long before they become emergencies. A Master Plumber can expertly assess sediment accumulation, anode rod condition, pressure relief valve function, and overall tank health. These inspections catch subtle issues that homeowners might miss and can even identify early signs of a need for sewer repair or replacement.
Why Annual Inspections are Essential
A yearly professional check-up is a proactive investment in your home's safety and your wallet. Manufacturers like Rheem, Bradford White, and A.O. Smith often require documented professional maintenance to keep the warranty valid. For homeowners in North Metro Atlanta, scheduling this service with JMJ Plumbing's certified team ensures you meet these requirements. For instance, an annual inspection for one of our Marietta homeowners identified a faulty pressure relief valve two months before it failed, avoiding a potential tank rupture and catastrophic water damage. Similarly, a family in Forsyth County's homeowner's insurance policy offered a 15% discount because they provided documented annual water heater maintenance from a certified professional.
Key Insight: Many serious water heater issues, like a deteriorating anode rod or a failing TPR valve, show no outward signs until it's too late. An annual inspection is your best defense against a sudden and costly emergency water heater replacement in Woodstock or a burst pipe repair in Alpharetta.
How to Prepare for a Professional Inspection
To get the most out of your annual service, a little preparation goes a long way. This ensures the plumber can work efficiently and you get all the information you need. Booking your appointment online through the JMJ Plumbing website is a convenient first step.
- Communicate Clearly: Before the plumber arrives, make a list of any changes you've noticed. This includes popping or rumbling sounds, inconsistent water temperatures, or any signs of moisture around the unit. Discussing these symptoms, like slow drains or a sewage smell, helps the technician diagnose underlying problems faster.
- Clear the Area: Ensure there is a clear, safe path to your water heater. Remove any storage boxes, laundry, or other clutter from around the unit so the technician has ample space to work.
- Prepare Your Questions: An inspection is a perfect opportunity to learn. Ask the plumber about the effects of hard water in your specific Acworth or Canton neighborhood, maintenance steps you can perform yourself, or the cost factors for potential sewer replacement vs. repair.
- Request Documentation: After the service, ask for a detailed written report. This document is vital for your records, especially for warranty and insurance purposes. It should outline the findings, any recommended repairs, and a suggested maintenance schedule based on your unit's age and condition.
Fall is an ideal time to schedule your inspection, as it prepares your system for the heavy demands of winter. Don't wait for a "no hot water" emergency on a cold morning. Contact JMJ Plumbing to ensure your water heater runs safely and efficiently all year.
8. Install a Water Heater Pan and Drain Line for Protection
A water heater pan, also known as a drip pan, is a simple but essential safety device placed beneath your water heater. This shallow basin is designed to catch water from small leaks, condensation, or a discharging temperature and pressure relief (TPR) valve. More importantly, it features a drain line that channels this water safely away from your home’s structure, protecting your floors, walls, and foundation from costly damage. This is one of the most vital water heater maintenance tips because it acts as your first line of defense against unnoticed water heater leaks.
Why a Water Heater Pan is a Must-Have
Slow leaks are often silent destroyers. A small, undetected drip can lead to thousands of dollars in repairs for rotted subflooring, mold remediation, and structural damage, especially for units in attics, closets, or finished basements. Many local building codes in Georgia now mandate their installation, and some homeowner insurance policies require a pan for coverage. For instance, a JMJ Plumbing customer in Canton had a new pan that caught a small leak just weeks after installation. The drain line directed the water away, preventing what could have easily been an $8,000+ basement flood repair. Similarly, a Roswell family avoided a denied insurance claim after a catastrophic leak because their required pan contained the initial burst, preventing foundational damage.
Key Insight: A water heater pan is your 24/7 leak monitor. The presence of water in the pan is an immediate, clear sign that your unit needs attention. Ignoring this can lead to a sudden burst pipe or tank failure, turning a small repair into an emergency water heater replacement in Marietta or Acworth.
How to Ensure Proper Pan Installation
While installing a pan is easiest during a new water heater installation or replacement, it can be retrofitted. For guaranteed safety and compliance, having a professional from JMJ Plumbing handle the job is your best option, whether in Woodstock or anywhere in Metro Atlanta.
- Proper Sizing: The pan must be appropriately sized for your water heater’s diameter, leaving a small gap around the unit's base.
- Correct Positioning: The pan should be placed on a level surface. It must be positioned so that it has a slight, consistent slope toward the drain opening to ensure water flows out and doesn't pool.
- Drain Line Installation: A drain line, typically PVC pipe, must be connected to the pan's outlet. This line must maintain a downward slope to a suitable termination point, like a floor drain, sump pump, or an exterior location away from your foundation.
- Regular Inspections: Check the pan monthly for any signs of water. Keeping the area around the pan clear of clutter ensures you can spot a problem quickly. If you see water, it's a clear signal to call for professional leak repair.
- Maintenance: Annually check that the drain line is clear of debris or clogs that could cause water to back up and overflow the pan.
8-Point Water Heater Maintenance Comparison
| Maintenance Item | 🔄 Implementation Complexity | ⚡ Resource & Time | 📊 Expected Outcomes | ⭐ Ideal Use Cases | 💡 Key Advantages / Tip |
|---|---|---|---|---|---|
| Flush Your Water Heater Tank Annually | Medium — drain/refill; DIY feasible with basic tools or pro service | ⚡ 30–45 min; DIY low cost; pro $150–$300; temporary hot‑water loss | Reduces sediment, improves heat transfer, cuts energy use, extends life ~5–10 yrs | Homes in hard‑water areas, older tanks, routine maintenance plans | Schedule in fall; turn off power/gas and attach hose; wear protection |
| Check & Replace the Anode Rod (3–5 yrs) | Medium–High — access top of tank; may require full/partial drain and proper tools | ⚡ Inspection inexpensive; replacement $150–$300 installed; can be done during flush | Prevents interior corrosion, extends tank life 5–15 yrs; avoids costly tank replacement | Tanks in hard water, older units, systems without sacrificial protection | Inspect during flush; replace if heavily corroded; keep maintenance log |
| Monitor & Maintain Temperature (120°F) | Low — adjust thermostat dial and verify with thermometer | ⚡ Minutes; free or minimal cost; periodic checks for drift | Saves ~6–8% energy, reduces scald risk, less thermal stress on tank | Families with children/elderly, energy‑conscious households | Verify at faucet with thermometer; use dishwasher heater if higher temps needed |
| Inspect & Test Pressure Relief Valve Annually | Low–Medium — manual lever test; pro required if replacement needed | ⚡ Quick test (minutes); replacement $75–$200 if faulty | Ensures safety; prevents overpressure, tank rupture, and code/insurance issues | All homes (mandatory safety); required for warranty/insurance | Lift lever gently, ensure discharge line drains; document tests |
| Inspect Water Connections & Drain Valve for Leaks | Low — monthly visual checks; pro for repairs | ⚡ Minutes monthly; repairs $100–$300; professional leak detection as needed | Early leak detection prevents major water damage and mold; preserves warranties | Basements, older systems, hard‑water regions | Wipe and recheck after 24 hrs; use paper towel test and photograph leaks |
| Insulate Tank & Hot Water Pipes | Low — easy DIY but must keep controls accessible | ⚡ DIY $30–$70; pro $100–$200; install in 1–2 hours | Reduces standby heat loss 3–9%, saves $10–$40/yr, lowers surface temp, reduces freeze risk | Unheated spaces, long pipe runs, energy‑efficiency upgrades | Leave PRV/thermostat accessible; wrap first 6 ft of hot pipes |
| Schedule Professional Annual Maintenance Inspections | Low to arrange, high expertise required — comprehensive multi‑point check | ⚡ 60–90 min typical; $100–$200 per visit; documentation provided | Catches issues early, extends lifespan, maintains warranty and safety compliance | All homeowners, rental/commercial properties, older systems | Request written report, schedule annually (fall recommended), ask for prioritized action list |
| Install a Water Heater Pan & Drain Line | Low–Medium — place pan and route drain; may need pro for proper routing | ⚡ Pan $30–$75; install $150–$300 if retrofitted; quick install | Contains slow leaks, directs discharge away from structure, prevents costly water damage | Basements, attics, garages, insurance‑required installations | Ensure pan slopes to drain, route to floor drain/sump or exterior, inspect monthly |
Your Next Steps for a Healthy Water Heater
You've just navigated a detailed guide to keeping your home’s unsung hero, the water heater, in prime condition. From the simple yet crucial annual tank flush to inspecting the anode rod and testing the temperature and pressure relief (TPR) valve, each step is a building block for a more reliable and efficient plumbing system. Mastering these fundamental water heater maintenance tips isn't just about avoiding a cold shower; it’s about protecting your home from costly water damage, extending the life of your appliance, and ensuring your family's safety.
Consistent maintenance transforms you from a passive homeowner into a proactive guardian of your property. By understanding the signs of trouble, like lukewarm water, strange noises, or small leaks, you can catch minor issues before they escalate into major emergencies. A slow drain today could be a sign of a looming sewer backup tomorrow, and a small puddle near your water heater might be the first warning of a tank failure that could lead to significant flooding. Recognizing these symptoms is your first line of defense.
The Power of Proactive Plumbing Care
The value of this knowledge extends far beyond just one appliance. A well-maintained water heater contributes to the overall health of your entire plumbing infrastructure. By keeping sediment at bay, you reduce the strain on your pipes and fixtures. By insulating your hot water lines, you save energy and money every single month. This approach is about creating a resilient home, one that's less susceptible to unexpected disasters like an emergency burst pipe repair or an urgent need for main water line repair in Cumming.
Think of your water heater as the heart of your home’s hot water supply. Neglecting it is like ignoring the check engine light in your car. Sooner or later, a breakdown is inevitable. But by following the maintenance schedule outlined in this guide, you can significantly delay or even prevent the need for a premature water heater replacement. This proactive stance is especially critical for homeowners in the North Metro Atlanta area, where water hardness can accelerate sediment buildup and anode rod corrosion.
When DIY Isn't Enough: Your Local Plumbing Experts
While many of these tasks are manageable for a dedicated DIYer, it's equally important to know your limits. Certain jobs, like a complex leak repair, anode rod replacement in a tight space, or any sign of a gas leak, demand professional expertise. If you notice signs that point to a bigger problem, such as a sewage smell in your home, water in your yard, or a clogged toilet that won't flush despite your best drain cleaning efforts, it's time to call for backup.
For residents in Woodstock, Acworth, Alpharetta, and across Cobb and Cherokee Counties, having a reliable emergency plumber on call is essential. Issues don't wait for business hours. A sewer backup or a failed water heater requires immediate attention. This is where professional service becomes invaluable, offering peace of mind and swift, effective solutions. Don't wait until you're standing in an inch of water to find a "24 hour plumber near me." Have a trusted partner in mind before disaster strikes.
Whether you're scheduling routine maintenance to keep your system in peak condition or facing an urgent plumbing crisis, JMJ Plumbing is ready to help. Our team of licensed Master Plumbers provides expert water heater services, from annual inspections in Marietta to emergency water heater replacement in Roswell. Don't let a small issue turn into a costly catastrophe; contact JMJ Plumbing today for dependable service across the North Metro Atlanta area.