Adjusting Shower Mixing Valve: Easy DIY Fix
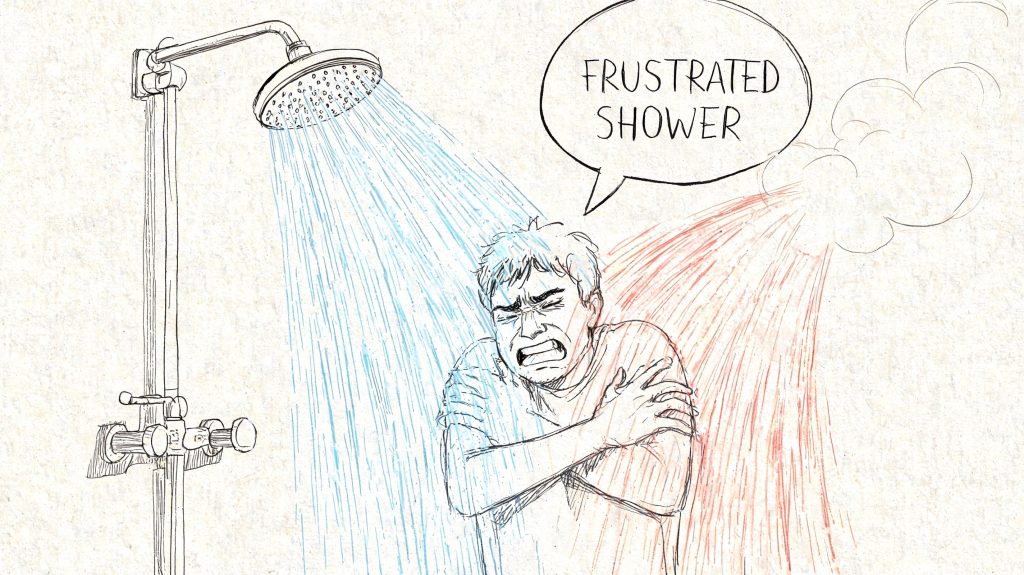
You turn on the shower, wait for the water to warm up, and instead get a stream that’s barely lukewarm. Or worse, it starts comfortable and then jumps hot enough to make you jerk back. That usually sends homeowners straight to “Do I need a new water heater?”
Sometimes the answer is no. A shower that won’t hold temperature often comes down to the valve behind the trim, not the tank in the garage or basement. Adjusting shower mixing valve settings can be a manageable fix when the valve is set too low or needs recalibration after seasonal changes.
The trick is knowing whether you’re dealing with a safe adjustment or the first sign of a bigger plumbing problem. In North Metro Atlanta homes, that difference matters. A single shower issue may point to one valve. House-wide hot water trouble, pressure changes, or signs of leaks can point somewhere else entirely.
Why Your Shower Is Suddenly Lukewarm or Scalding Hot
A shower mixing valve controls how much hot and cold water meet before the water reaches the showerhead. When that balance drifts, the shower can feel inconsistent, weakly warm, or too hot for comfort. In many homes, the valve itself isn’t broken. It’s just set conservatively from the factory or has fallen out of calibration.

That’s especially common after plumbing work, cartridge replacement, or weather shifts. Cold incoming water changes through the year, and that can affect the final mixed temperature at the shower. What felt fine in warmer months can feel disappointing when the supply water gets colder.
What the valve is actually doing
Most modern shower valves include some type of anti-scald protection. Depending on the model, that means the valve reacts to pressure changes, temperature changes, or both. Its job is to keep the outlet water stable enough that a toilet flush, faucet use, or supply change doesn’t turn your shower into a surprise.
When that system is set too low, homeowners often assume the water heater is failing. But if the sink gets hot and only one shower doesn’t, the mixing valve becomes the first suspect.
A shower that runs lukewarm in one bathroom but hot everywhere else usually points to the fixture, not the whole hot water system.
Why this matters before you grab tools
A minor adjustment is one thing. Forcing the wrong valve the wrong way is another. Shower trim parts look simple from the outside, but the temperature stop, cartridge, O-ring, and handle hardware all need to go back exactly as they came apart.
Before touching anything, it helps to narrow down whether you’re solving a simple comfort issue or covering up a failing cartridge, pressure problem, or water heater issue.
Diagnosing the Real Source of Your Water Temperature Problem
Before removing a handle, test the rest of the house. That quick check tells you whether the shower valve is the likely problem or whether the issue starts upstream.
If every faucet has weak hot water or no hot water, stop focusing on the shower. That points more toward the heater, its settings, or its recovery. If you need a deeper look at that side of the system, review water heater repair and replacement options.
Start with a simple house check
Run hot water at a nearby sink, then another bathroom, then the kitchen. Pay attention to two things: whether the hot water gets properly hot, and whether the pressure feels normal.
Use this quick checklist:
- Only one shower has the problem: The valve or cartridge in that shower is the likely issue.
- Every fixture is lukewarm: Look at the water heater before anything else.
- Temperature changes come with pressure drops: A supply imbalance may be involved.
- The shower starts hot then fades fast: That can indicate a valve issue, but it can also reflect system-wide hot water trouble.
- A sink gets hot but the shower won’t: The mixing valve becomes a strong suspect.
What thermostatic valves are supposed to do
A properly working thermostatic mixing valve should hold the mixed water temperature within ±3°F even when supply pressures change by up to 20%, per ASSE 1017, as summarized in this ASSE standards reference from Leonard Valve.pdf). That level of control is one reason these valves are used for scald protection.
If your shower swings far beyond that, the problem may not be a basic setting. It may be a worn cartridge, debris in the valve body, or pressure conditions the valve can’t compensate for.
Georgia homes add a seasonal wrinkle
Codes require limit stops to be adjusted for seasonal cold water changes, and that matters in Georgia. A valve setting that felt right when incoming cold water was warmer can feel underpowered later. Homeowners often notice this as “my shower won’t get hot enough anymore,” even though nothing appears broken.
Practical rule: If the issue is isolated to one shower and the rest of the house has stable hot water, a careful adjustment is reasonable. If the whole house is affected, diagnose the main system first.
Clues that point away from the valve
Some symptoms don’t fit a simple mixing valve adjustment:
- Low pressure throughout the house
- Water in the yard
- Leaks near the heater
- Sewage smell or drainage trouble happening at the same time
- Repeated temperature loss after other fixtures run
Those signs can overlap with larger plumbing problems, including supply or drainage issues. In those cases, adjusting the shower handle may only distract you from the actual repair.
Identifying Your Shower Valve and Cartridge Type
Many DIY jobs often go sideways at this stage. The handle may look familiar, but the internals can differ a lot by brand and valve style. If you misidentify the valve, you can loosen the wrong part, over-rotate the cartridge, or pinch an O-ring during reassembly.
Successful adjustment starts with recognizing whether you have a pressure-balance valve, a thermostatic valve, or an older manual mixing valve. If you want a visual reference for common setups, this overview of shower valve service types helps.
Shower Mixing Valve Types at a Glance
| Valve Type | How it Works | Common Appearance | Best For |
|---|---|---|---|
| Pressure-balance | Reacts to pressure changes between hot and cold lines | Usually one handle | Homes with standard residential shower setups |
| Thermostatic | Reacts to temperature and maintains a chosen setting | Often two controls or a dedicated temperature control | Users who want steadier shower temperature |
| Manual single-handle | Mixes hot and cold without advanced compensation | Older one-handle trim | Older installations where temperature stability is less refined |
How to tell them apart at the wall
A pressure-balance valve is the most common modern setup in residential bathrooms. Usually, one handle controls both flow and temperature. These valves help prevent major temperature swings caused by pressure changes elsewhere in the house.
A thermostatic valve often gives you more precise control. Many have one control for volume and another for temperature, though appearances vary by manufacturer. These are more sensitive to calibration and usually reward careful adjustment more than force.
An older manual valve often lacks the same anti-scald behavior as newer designs. If the trim is dated and the controls feel loose or inconsistent, don’t assume the process matches what you’ve seen in a generic online video.
The small parts that cause big trouble
During disassembly, watch the handle hardware closely. The small hex screw securing the handle can drop straight into the drain, and once that happens, the repair can get more complicated fast. The cartridge handling and reassembly guidance here also notes that the O-ring beneath the cartridge is vital, and a poorly reseated O-ring is a common cause of leaks after adjustment.
Cover the drain before removing trim. A towel or drain cover is cheap insurance against losing a tiny screw or clip.
Don’t trust generic directions too much
Homeowners often search for “which way is hotter” and then apply one universal method to every valve. That’s risky. Some handles use a rotational stop. Some require cartridge repositioning. Some thermostatic trims calibrate from the handle itself, not from a simple stop ring.
If you don’t know the brand, check the escutcheon, back of the handle, or any paperwork from a remodel. Matching the valve first saves time and prevents damage.
A Step-by-Step Guide to Adjusting the Temperature Limit Stop
Once you’ve confirmed the issue is limited to the shower and you’ve identified the valve type, you can make a careful adjustment. Most shower valves leave the factory set low for safety. The usual adjustment point is the temperature limit stop, a built-in mechanical governor that restricts how far the handle can move toward the hot side, as shown in this temperature limit stop adjustment walkthrough.
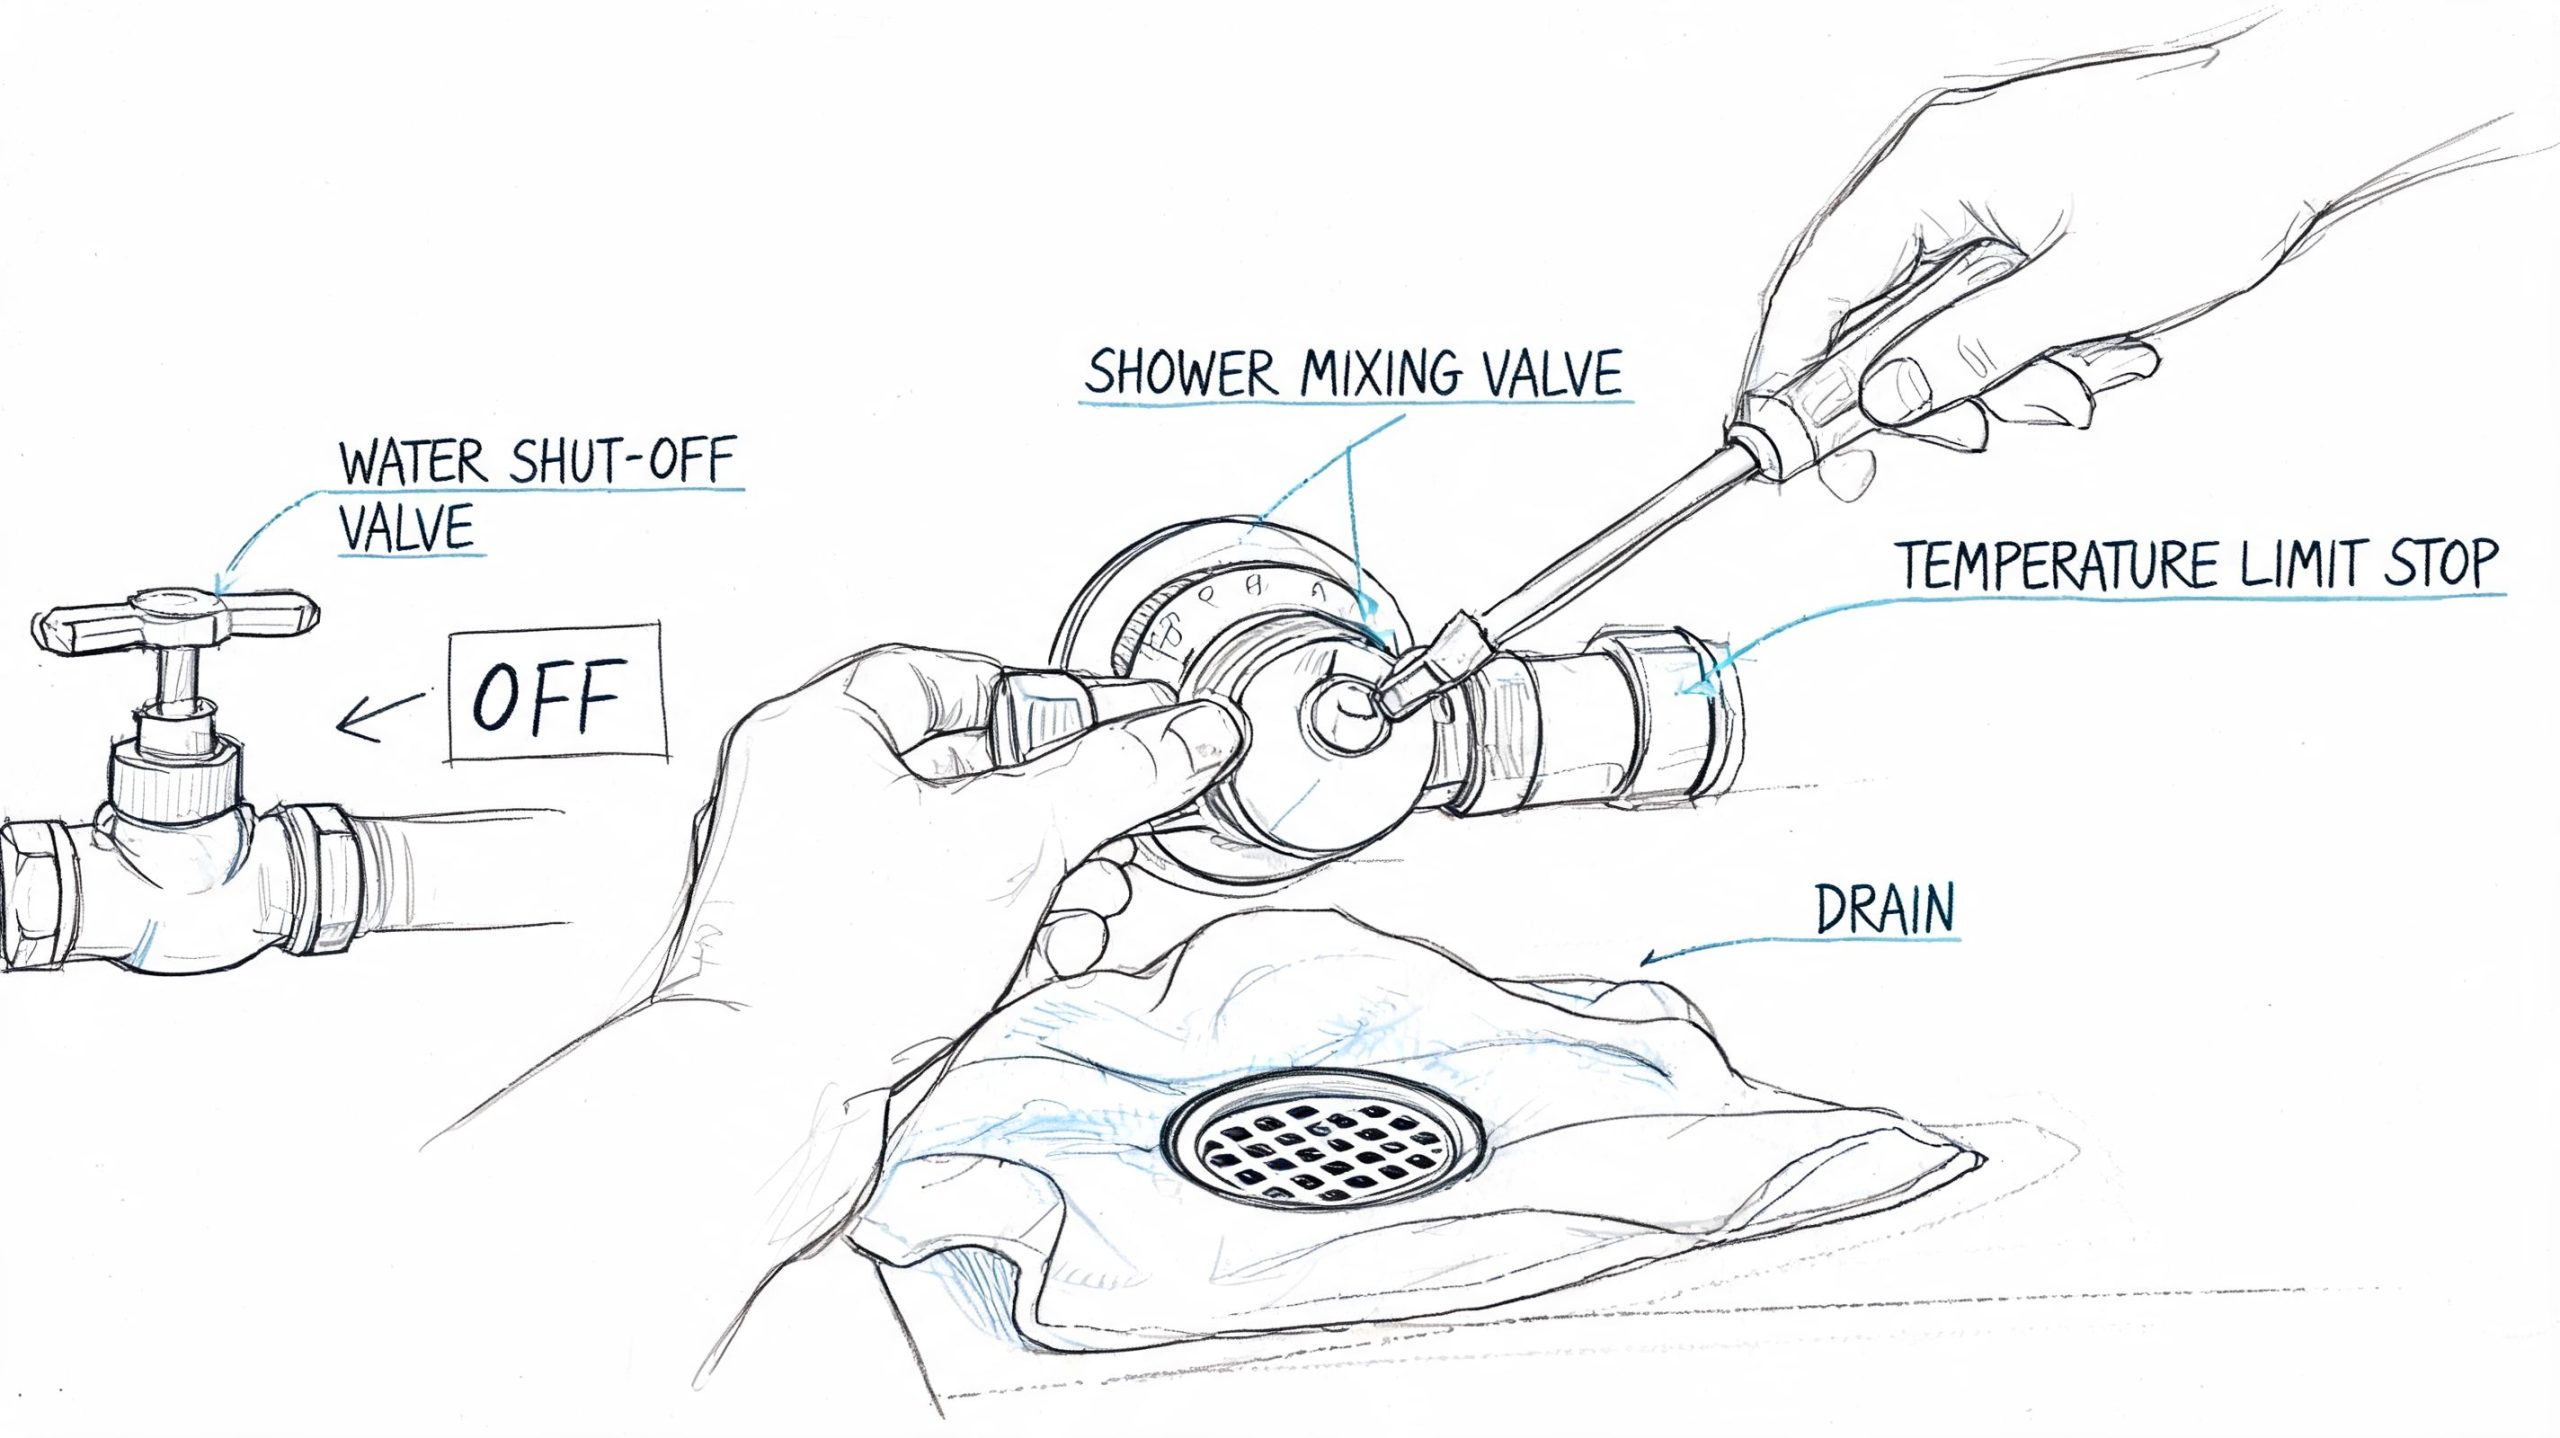
That same walkthrough notes that plumbers typically make changes in small 5 to 10 degree increments and test between adjustments, rather than cranking the valve to maximum right away.
Gather the right tools first
You don’t need a truck full of tools, but you do need the right ones nearby:
- Screwdriver or Allen wrench: Most handles use one or the other.
- Pliers: Useful for some cartridge adjustments, but use a light touch.
- Thermometer: Needed to verify the result instead of guessing by feel.
- Towel or drain cover: Protects screws and clips from disappearing.
- Flashlight: Helps you see the stop mechanism clearly.
If you’re comparing trim and fixture hardware before replacing worn components, it also helps to compare leading tapware brands so you can see how designs differ from one manufacturer to another.
Shut off water and expose the valve
Turn off the water supply to the shower if the fixture has local stops. If it doesn’t, shut off the home’s main water line before you start opening trim. Then place a towel over the drain.
Remove the handle carefully. On many single-handle valves, that means loosening the center screw or a small side-mounted hex screw. Don’t fully remove more hardware than you need.
Adjusting a single-handle valve
For many single-handle setups, the process is straightforward:
- Loosen the center screw slightly. Don’t back it all the way out unless the design requires full removal.
- Access the limit stop or cartridge. This may be a plastic ring, rotational stop, or cartridge end.
- Rotate in small increments. On many valves, turning counterclockwise allows more hot water, but don’t assume that applies to every brand.
- Reassemble enough to test. You want the handle secure before running water.
The key detail from the field is simple. Small changes matter. If you overshoot, you can create a scald risk instead of solving a comfort issue.
Adjusting a thermostatic valve
Thermostatic valves need more patience. Instead of a broad “hotter or colder” movement, you’re usually calibrating a temperature control that’s designed to hold a chosen output.
Start by exposing the trim and locating the temperature adjustment screw or handle stop. Make a tiny change, reassemble enough to test, then run the water and measure. If the control feels stiff, gritty, or uneven, stop. That often means scale, internal wear, or a deeper issue.
“If the valve doesn’t respond smoothly, don’t force it. Rough movement usually means something inside needs service, not more turning.”
Reassemble carefully
Once the temperature is closer to where you want it, put everything back exactly as it came apart. Make sure the handle sits correctly and the trim plate is aligned.
Two mistakes cause a lot of callbacks: removing a screw farther than needed, and pinching seals during reassembly. If the cartridge was disturbed, check that the O-ring is seated properly before tightening anything.
Test before calling it done
Turn the water supply back on slowly. Let the shower run and test the maximum hot setting with a thermometer. You want a safe, usable result, not the hottest possible output.
If you only test for a few seconds, you can miss drift. Let the water stabilize, then check again. A shower that feels fine right away but wanders later may still need professional attention.
How to Test Your Adjustment and Fix Common Problems
A shower valve adjustment isn’t finished when the handle goes back on. It’s finished when the valve holds a safe temperature and stays dry under operation.
Brand differences matter here. Generic “quarter-turn” advice can lead to damage or leaks. The post-adjustment guidance in this model-variation and verification review stresses letting the water run for 5 to 10 minutes and confirming the temperature stabilizes within a 2°F tolerance.
What to check right away
Turn the water on slowly and watch around the handle and trim plate. Then look again after the shower has been running.
Check these areas:
- Handle base: A drip here often points to a disturbed seal or loose hardware.
- Trim plate edge: Moisture behind the escutcheon can signal a reassembly issue.
- Temperature behavior: If it climbs and falls after adjustment, calibration may not be the underlying problem.
If the handle drips after reassembly
A drip doesn’t always mean the valve body is cracked. Often the problem is simpler. The cartridge may not be fully seated, the O-ring may be out of place, or the packing nut may need careful tightening.
Tightening should be controlled, not aggressive. If parts feel misaligned, reopen the trim and inspect instead of forcing them together.
If the temperature still wanders
A stable adjustment should stay stable. If the shower still surges hot and cold after a careful reset, the problem likely goes beyond the limit stop.
Check this before using the shower normally: Run the water long enough to confirm the setting holds steady, then verify the hottest setting with a thermometer instead of your hand.
Persistent fluctuation usually points toward a cartridge problem, debris, or a pressure issue elsewhere in the system.
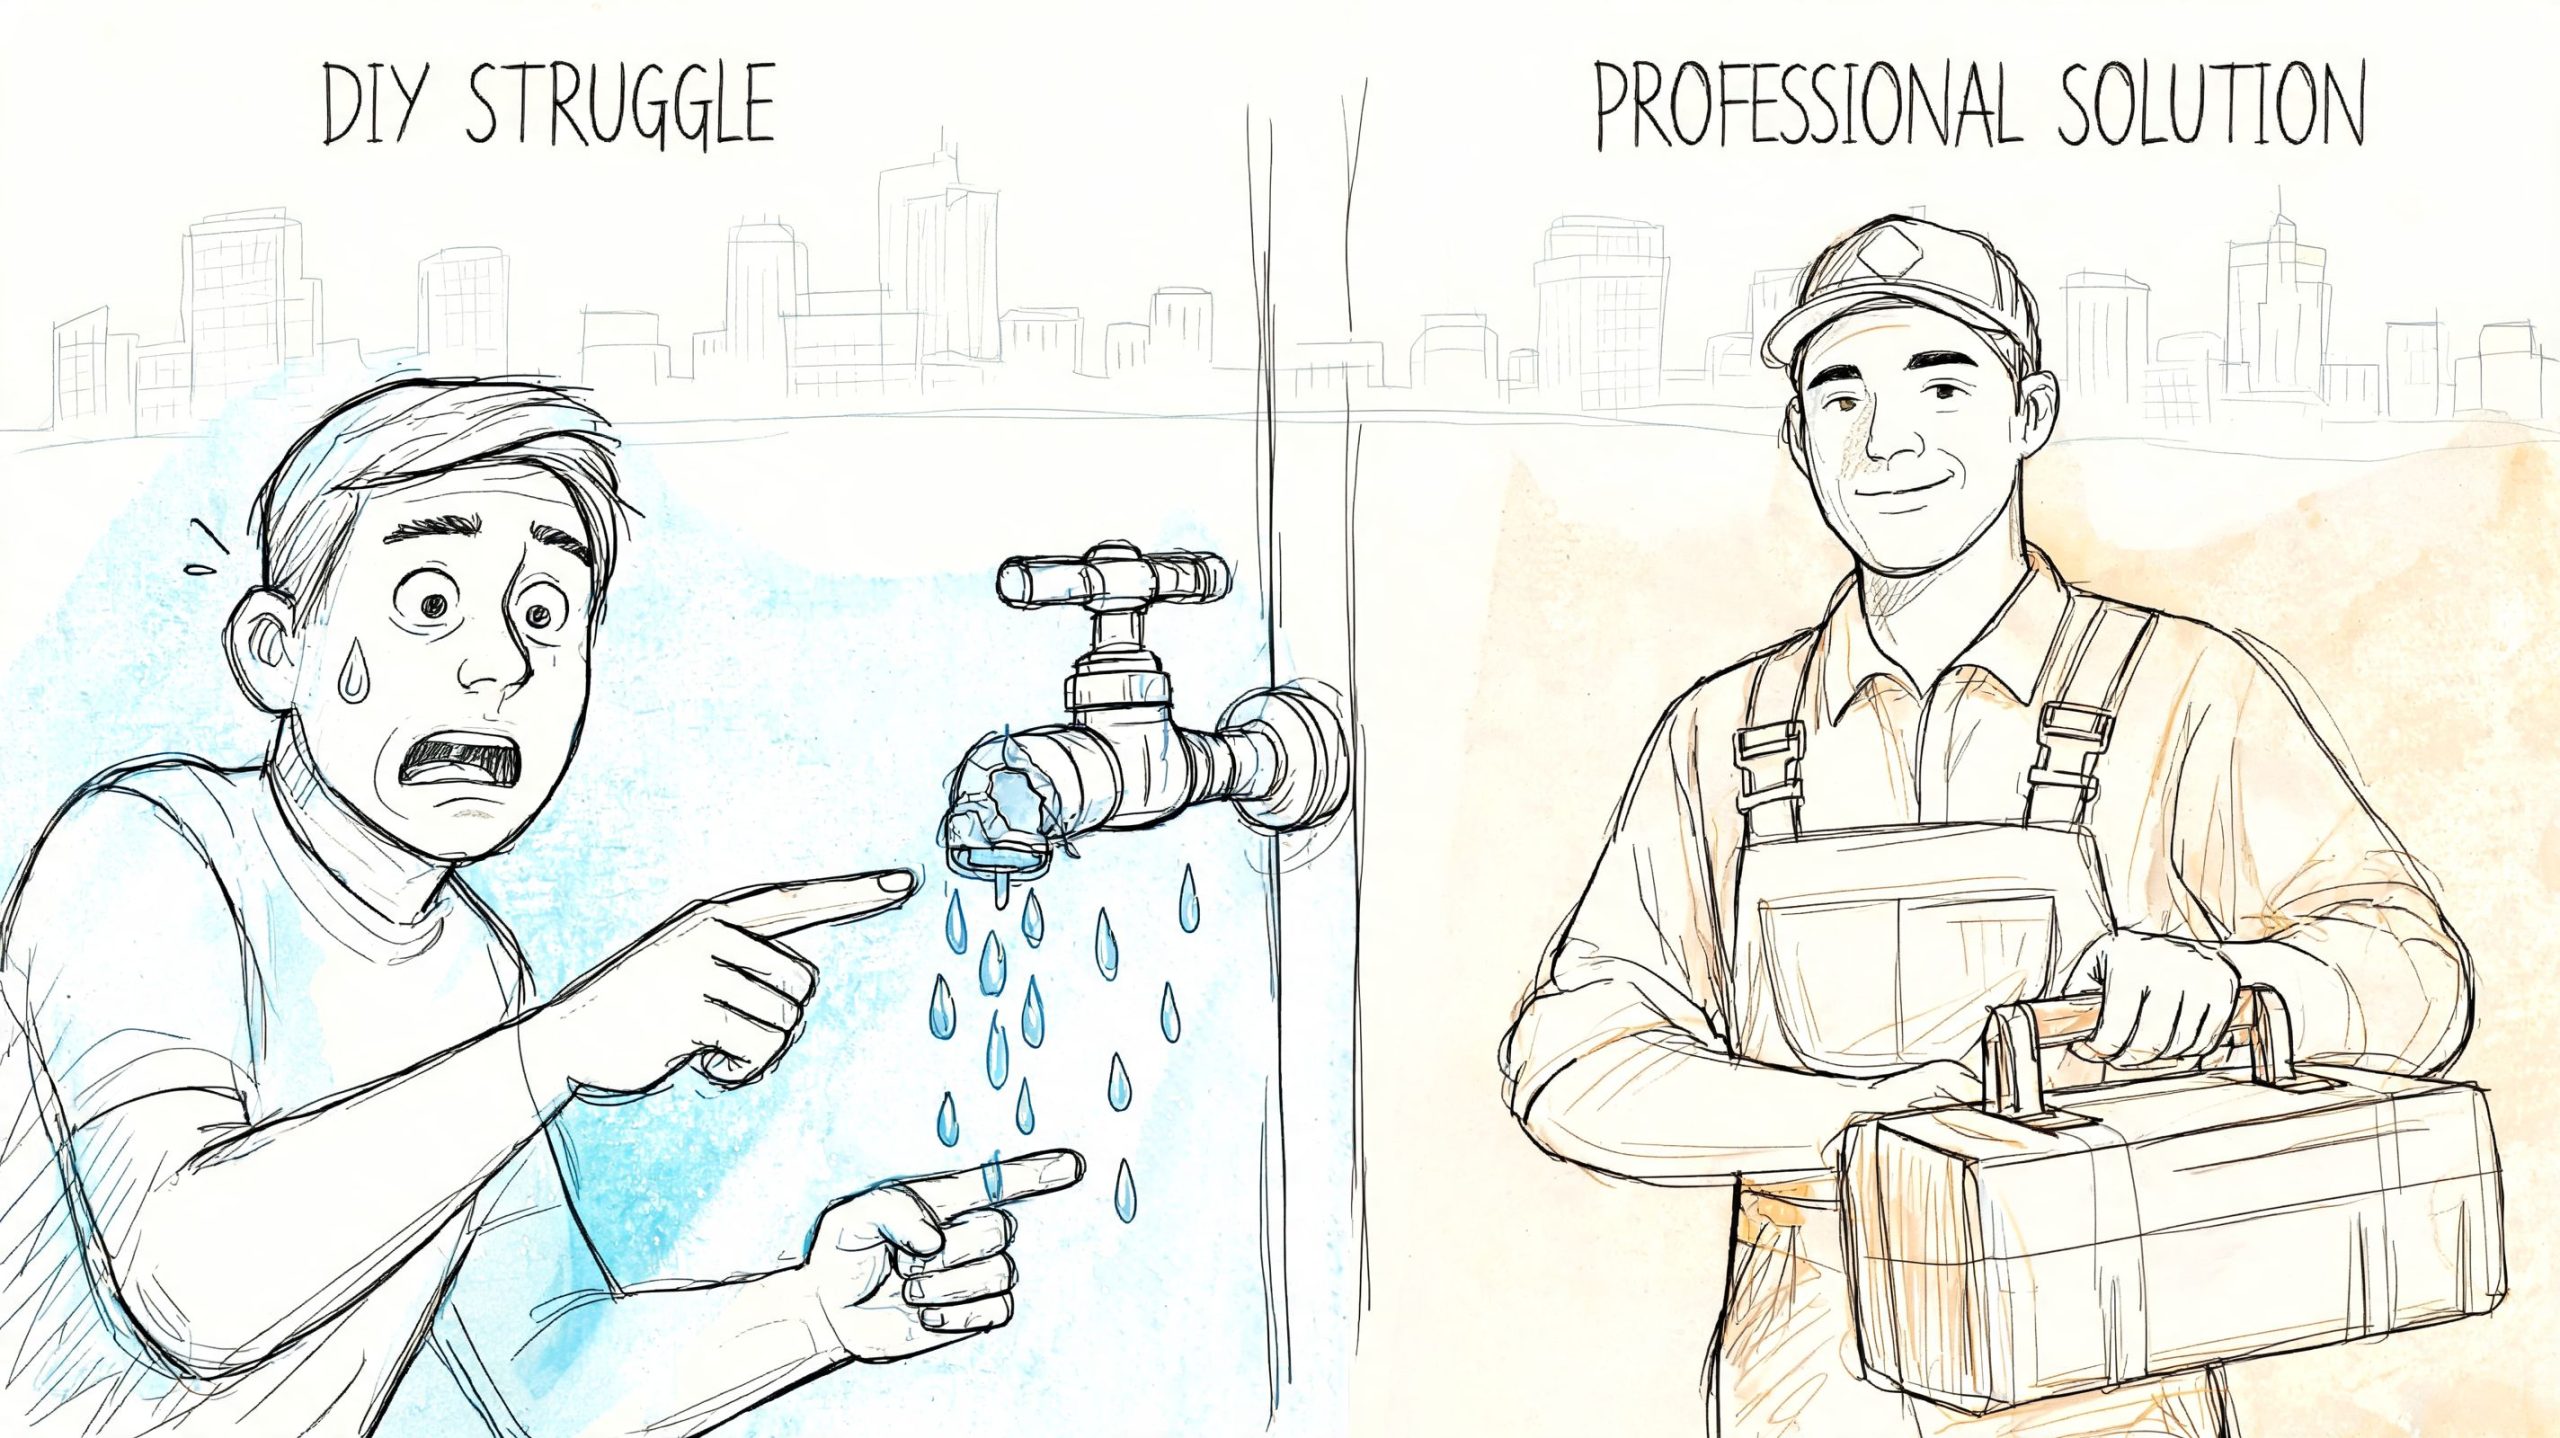
When to Skip DIY and Call a Plumber in North Metro Atlanta
Some shower valve jobs are good DIY work. Some aren’t. Knowing the difference saves homeowners from broken trim, hidden leaks, and flooded walls.
If you’ve made a careful adjustment and the shower is still not right, stop there. Persistent trouble after adjustment often signals deeper faults such as sediment buildup, a failing thermostatic element, or pressure imbalances greater than 20%, which a simple tweak won’t fix, as noted in this diagnostic discussion of failed valve adjustments. That same source notes that in North Metro Atlanta, where hard water can speed valve corrosion, an estimated 25% of professional service calls involve fixing post-DIY flood damage.
Stop immediately if you see these red flags
Some signs mean the job has moved beyond adjusting shower mixing valve settings:
- The cartridge won’t turn smoothly: Resistance usually means buildup, wear, or internal damage.
- The shower leaks after reassembly: That can come from a displaced seal, damaged threads, or a disturbed cartridge.
- The water is still cold after adjustment: The valve may be clogged or the hot side may not be reaching the fixture properly.
- Temperature swings happen with pressure loss: That can point to a larger supply issue.
- You notice water where it shouldn’t be: Water in the wall cavity, around trim, or below the bathroom is never a “wait and see” problem.
Older homes raise the risk
Many older homes around Roswell, Woodstock, Marietta, and Canton have valves that have seen years of mineral exposure. On those fixtures, trim parts may come apart easily while the cartridge itself is seized in place. That’s when homeowners break retaining clips, crack trim, or twist a serviceable valve into a replacement job.
A basic home maintenance checklist can help you separate small repairs from skilled trade work. This handyman home repairs guide is a useful example of where DIY ends and specialized service begins.
When the shower problem may not be the real problem
If the shower issue arrives alongside any of the following, don’t stay focused on the valve:
- Low water pressure through the house
- No hot water anywhere
- Water in the yard
- A sewage smell
- A clogged toilet that won’t flush and shower drainage acting up together
- Signs of a leak under the slab or behind walls
At that point, you may be dealing with a broader plumbing issue such as leak repair, main water line repair, sewer backup, drain cleaning, or water heater service. A shower symptom can be the first thing you notice, not the main repair you need.
Emergency situations aren’t DIY situations
If water won’t shut off, the handle assembly comes apart unexpectedly, the wall starts leaking, or the valve body appears damaged, call for help right away. That’s not the time to keep experimenting with pliers.
For urgent help, use an emergency plumber in North Metro Atlanta when the problem turns from “annoying shower” into active leak, loss of service, or damage risk. That matters whether you’re in Acworth, Alpharetta, Johns Creek, Cumming, Woodstock, or anywhere else across Cobb County, Cherokee County, North Fulton, or Forsyth County.
A good rule is simple. If the adjustment is small, controlled, and reversible, a homeowner can often handle it. If the valve fights back, leaks, or behaves unpredictably, it’s time for a licensed plumber.
If your shower still won’t hold temperature, starts leaking after adjustment, or points to a bigger plumbing problem, contact JMJ Plumbing. Their licensed team serves North Metro Atlanta with 24/7 help for emergency plumber calls, water heater replacement, leak repair, drain cleaning, sewer repair, sewer replacement, burst pipe repair, main water line repair, and more.