How to Stop Dripping Faucet: 2026 DIY Fixes

A dripping faucet usually gets ignored for too long because it looks small. You hear it at night, jiggle the handle a little harder, and tell yourself you’ll deal with it this weekend. Then the weekend passes.
The trouble is that a faucet drip is rarely just about the sound. It can be a worn washer, a failing cartridge, mineral buildup from hard water, or pressure problems that are rough on more than one fixture in the house. In North Metro Atlanta homes, especially in places like Woodstock, Marietta, Alpharetta, and Roswell, I see all of those causes come into play.
If your goal is to stop dripping faucet problems for good, the repair itself matters, but the reason behind the leak matters just as much. A quick part swap can work. A quick part swap on the wrong diagnosis usually doesn't.
That Drip Is Costing You More Than Your Sanity
The sound is annoying. The wasted water is worse.
A faucet dripping once per second wastes 3,000 gallons of water annually, which is enough water for more than 180 showers, and it can add up to $100 per year to your water bill, according to the EPA figures summarized here. That’s from one faucet. One drip. One handle you’ve been meaning to fix.
For a lot of homeowners, the leak starts small enough that it feels harmless. It isn’t. The parts inside a faucet don’t heal themselves. A worn seal keeps wearing. A loose component keeps moving. Mineral buildup keeps scratching and stressing the sealing surfaces every time you turn the handle.
Why faucet drips usually get worse
Most drips come from one of a few root problems:
- Worn sealing parts like washers or O-rings
- A failing cartridge inside a single-handle faucet
- Hard water scale that keeps parts from sealing cleanly
- High water pressure that puts extra strain on internal components
- Damage from overtightening the handle to force the drip to stop
Practical rule: If you have to crank the handle tighter than usual, the faucet is asking for repair, not more force.
That’s the difference between a nuisance and a plumbing issue. You’re not just trying to silence a sound. You’re trying to stop water waste and prevent a simple fixture problem from turning into a bigger leak under the sink or behind the wall.
Identify Your Faucet and Gather Your Arsenal
Before you take anything apart, figure out what kind of faucet you have. That one step saves a lot of frustration because the repair path changes based on the valve design inside the body.
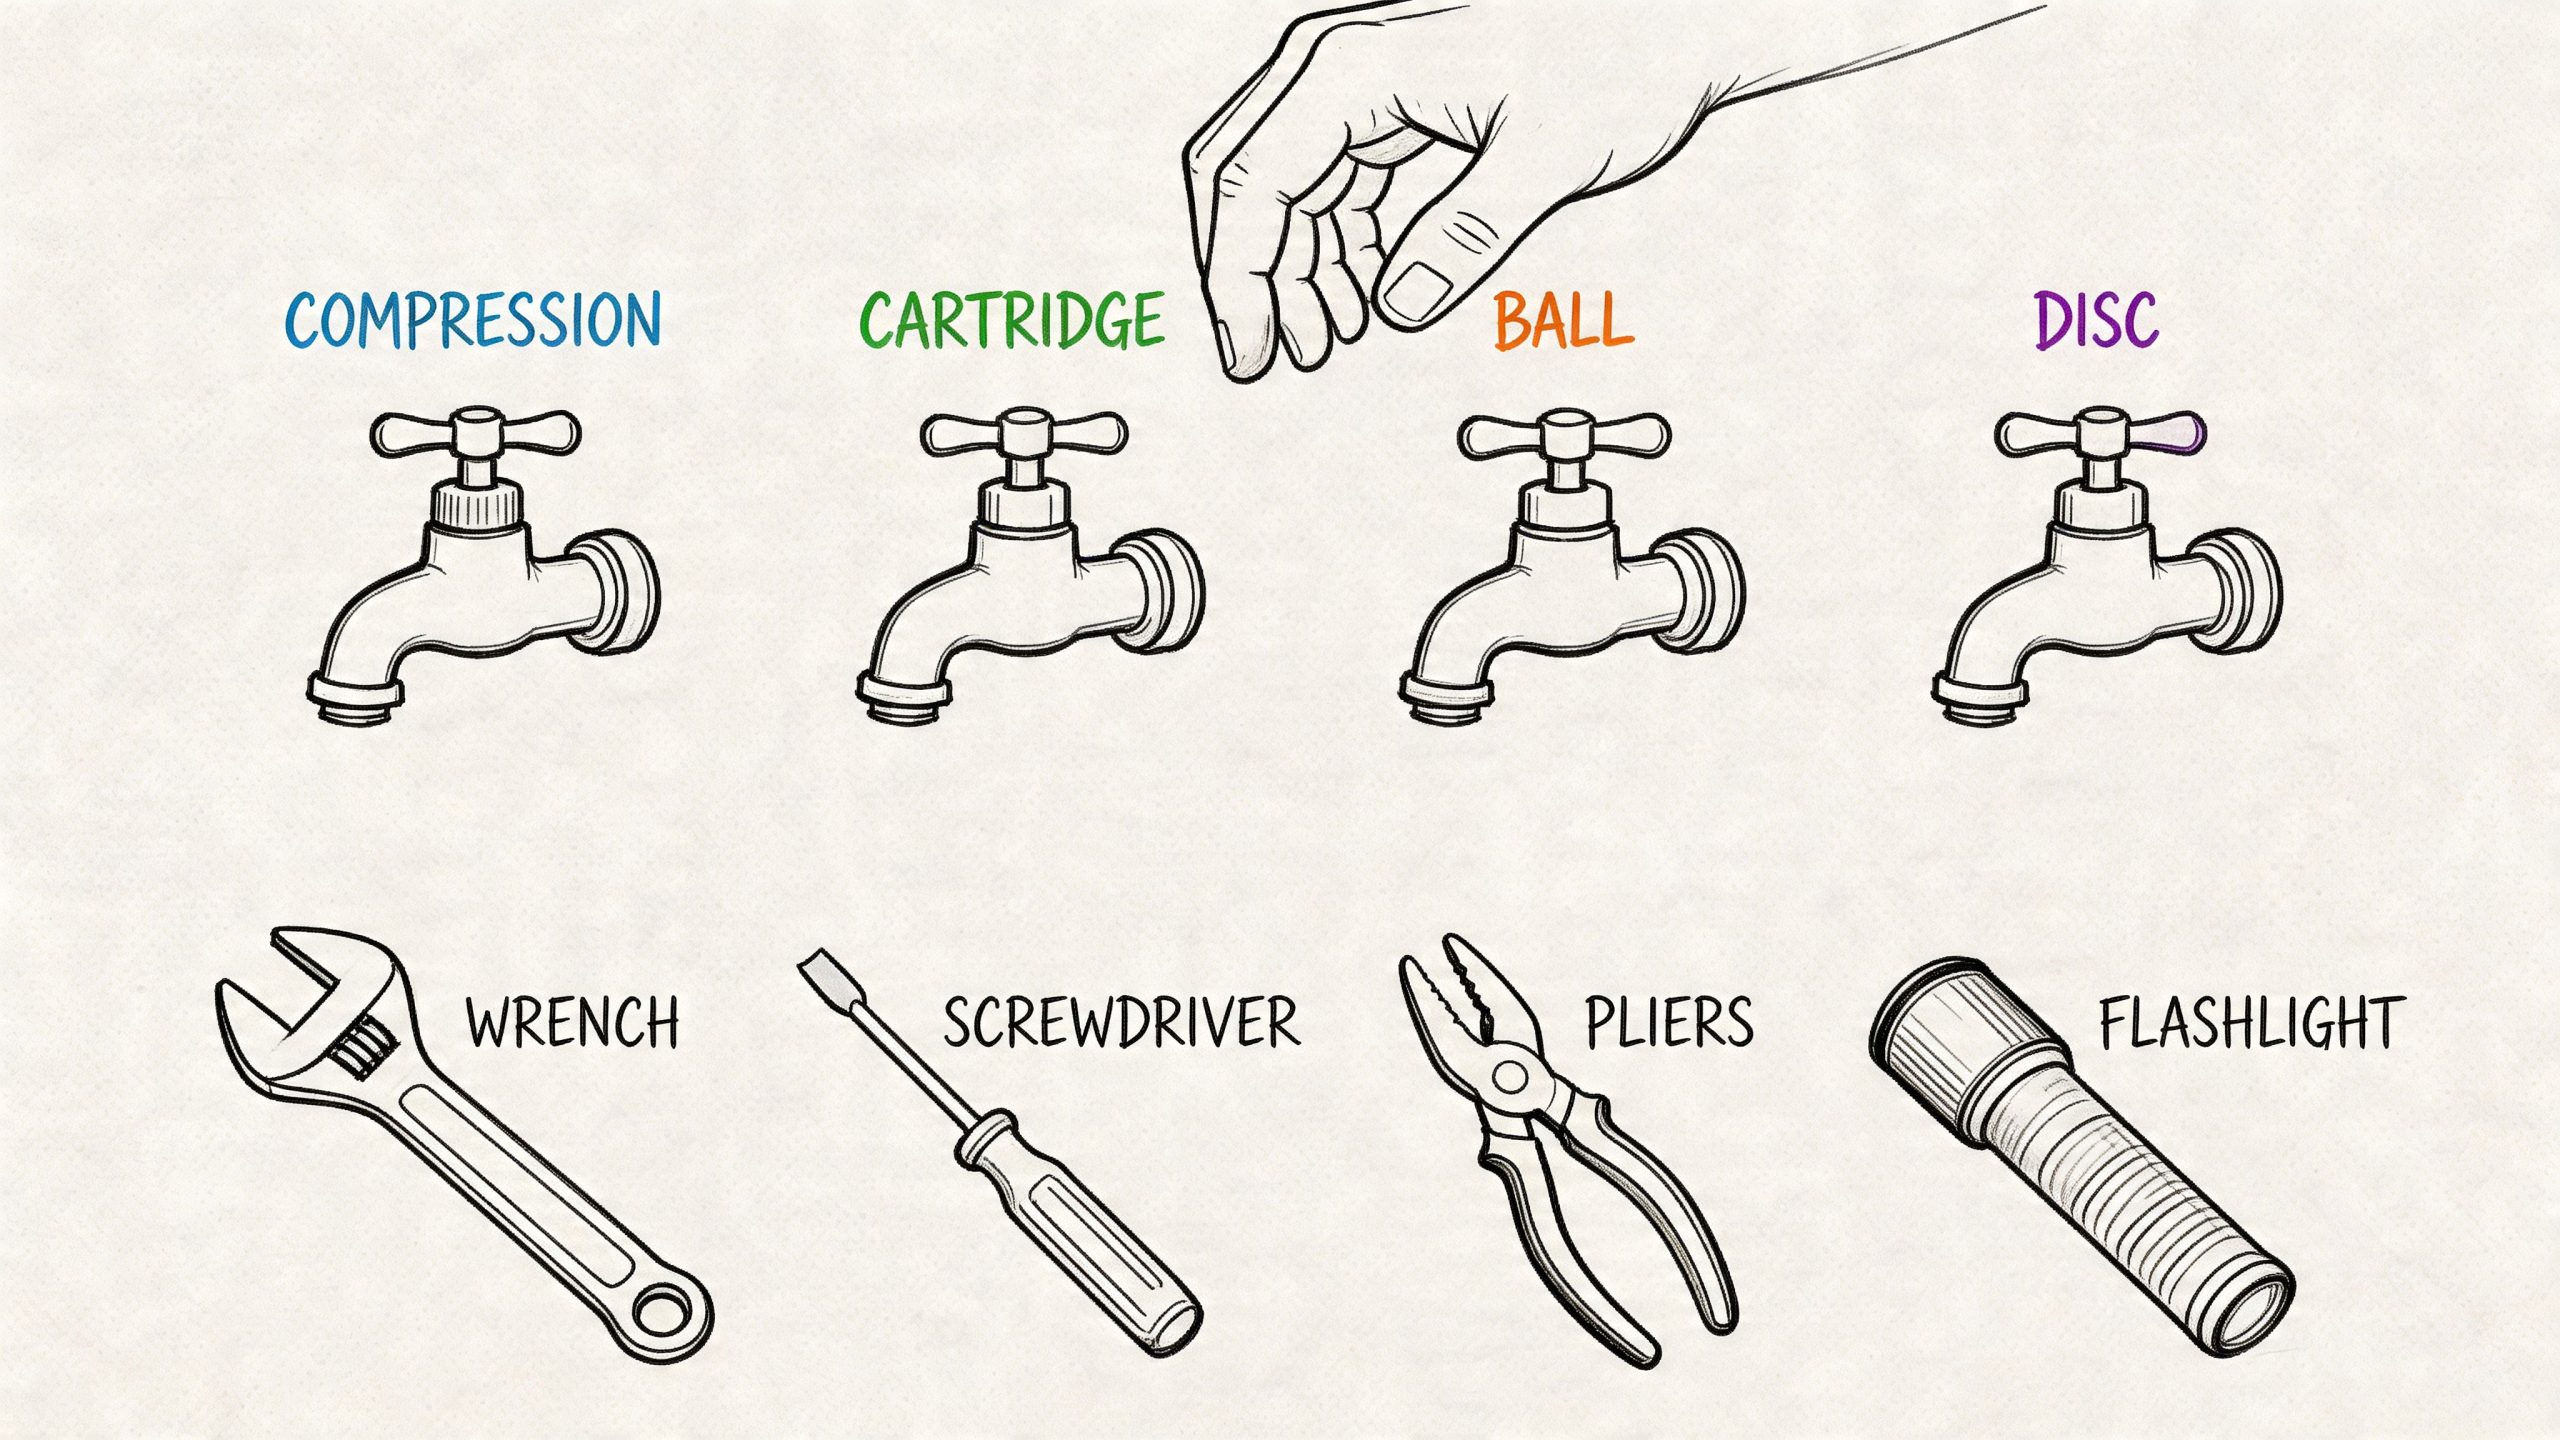
Four faucet types you’ll run into
Compression faucet
This is the old-school style with two handles that you tighten down to shut off water. If the handles need that familiar twist to close, it’s probably compression. These are common in older homes around Woodstock and Marietta.
Cartridge faucet
This style is often single-handle, though some two-handle versions use cartridges too. The handle movement feels smoother than a compression faucet. Instead of tightening a washer against a seat, the faucet uses a cartridge assembly to control flow.
Ball faucet
This is usually a single-handle kitchen faucet with a rounded cap and a handle that moves in several directions. It has more internal parts than most other faucet types, including small seals and springs.
Ceramic disk faucet
This one often feels sturdy and smooth with a wider faucet body. It uses ceramic disks internally and is generally durable, but when it leaks, the seals or mating surfaces need attention.
How to identify it fast
Use these clues before you head to the hardware store:
- Count the handles: Two handles often means compression, but some two-handle faucets use cartridges.
- Notice how it shuts off: A faucet that needs tightening is usually compression.
- Look at the cap shape: Rounded dome style often points to a ball faucet.
- Check the age of the fixture: Older fixtures lean compression. Newer ones often use cartridges or ceramic disks.
If the brand name is visible on the handle, escutcheon, or base, write it down. That small detail helps when you need an exact washer, stem part, or cartridge.
Tools that actually help
You don’t need a giant plumbing kit to stop dripping faucet issues, but a few tools matter a lot:
- Phillips and flathead screwdrivers for handle screws and trim caps
- Allen key set for set screws on modern handles
- Adjustable wrench for packing nuts and retaining nuts
- Needle-nose pliers for clips, springs, and small parts
- Rag or sink stopper to block the drain
- Small tray or cup to hold screws in order
- Plumber’s grease for O-rings and moving seals
- Replacement parts matched to the faucet instead of guesswork parts
Essential Tools & Parts by Faucet Type
| Faucet Type | Essential Tools | Common Replacement Parts |
|---|---|---|
| Compression | Phillips screwdriver, adjustable wrench, rag, pliers | Seat washer, O-rings, stem parts |
| Cartridge | Allen key or screwdriver, pliers, adjustable wrench, cloth | Cartridge, O-rings, retaining clip if damaged |
| Ball | Allen key, pliers, small screwdriver, wrench | Cam, seals, springs, repair kit parts |
| Ceramic Disk | Screwdriver, adjustable wrench, cloth | Neoprene seals, O-rings, replacement disk assembly if needed |
A few setup habits that prevent trouble
Do these before disassembly:
- Shut off both supply stops under the sink.
- Open the faucet to bleed off pressure.
- Plug the drain with a rag.
- Take a photo at each stage so you can reverse the process cleanly.
- Lay parts out in order from left to right.
A clean repair starts before the first screw comes out. Most faucet mistakes happen during disassembly, not during reassembly.
If you skip the identification step, you can buy the wrong kit, force the wrong part, and turn a simple leak into a stripped handle, broken stem, or cracked trim piece. The best DIY faucet repairs are slow at the beginning and faster after that.
Your Guide to Fixing a Compression Faucet
Compression faucets are still everywhere in older kitchens, bathrooms, and laundry sinks. If you have two handles and they need to be tightened to stop the water, there’s a good chance this is your faucet type.
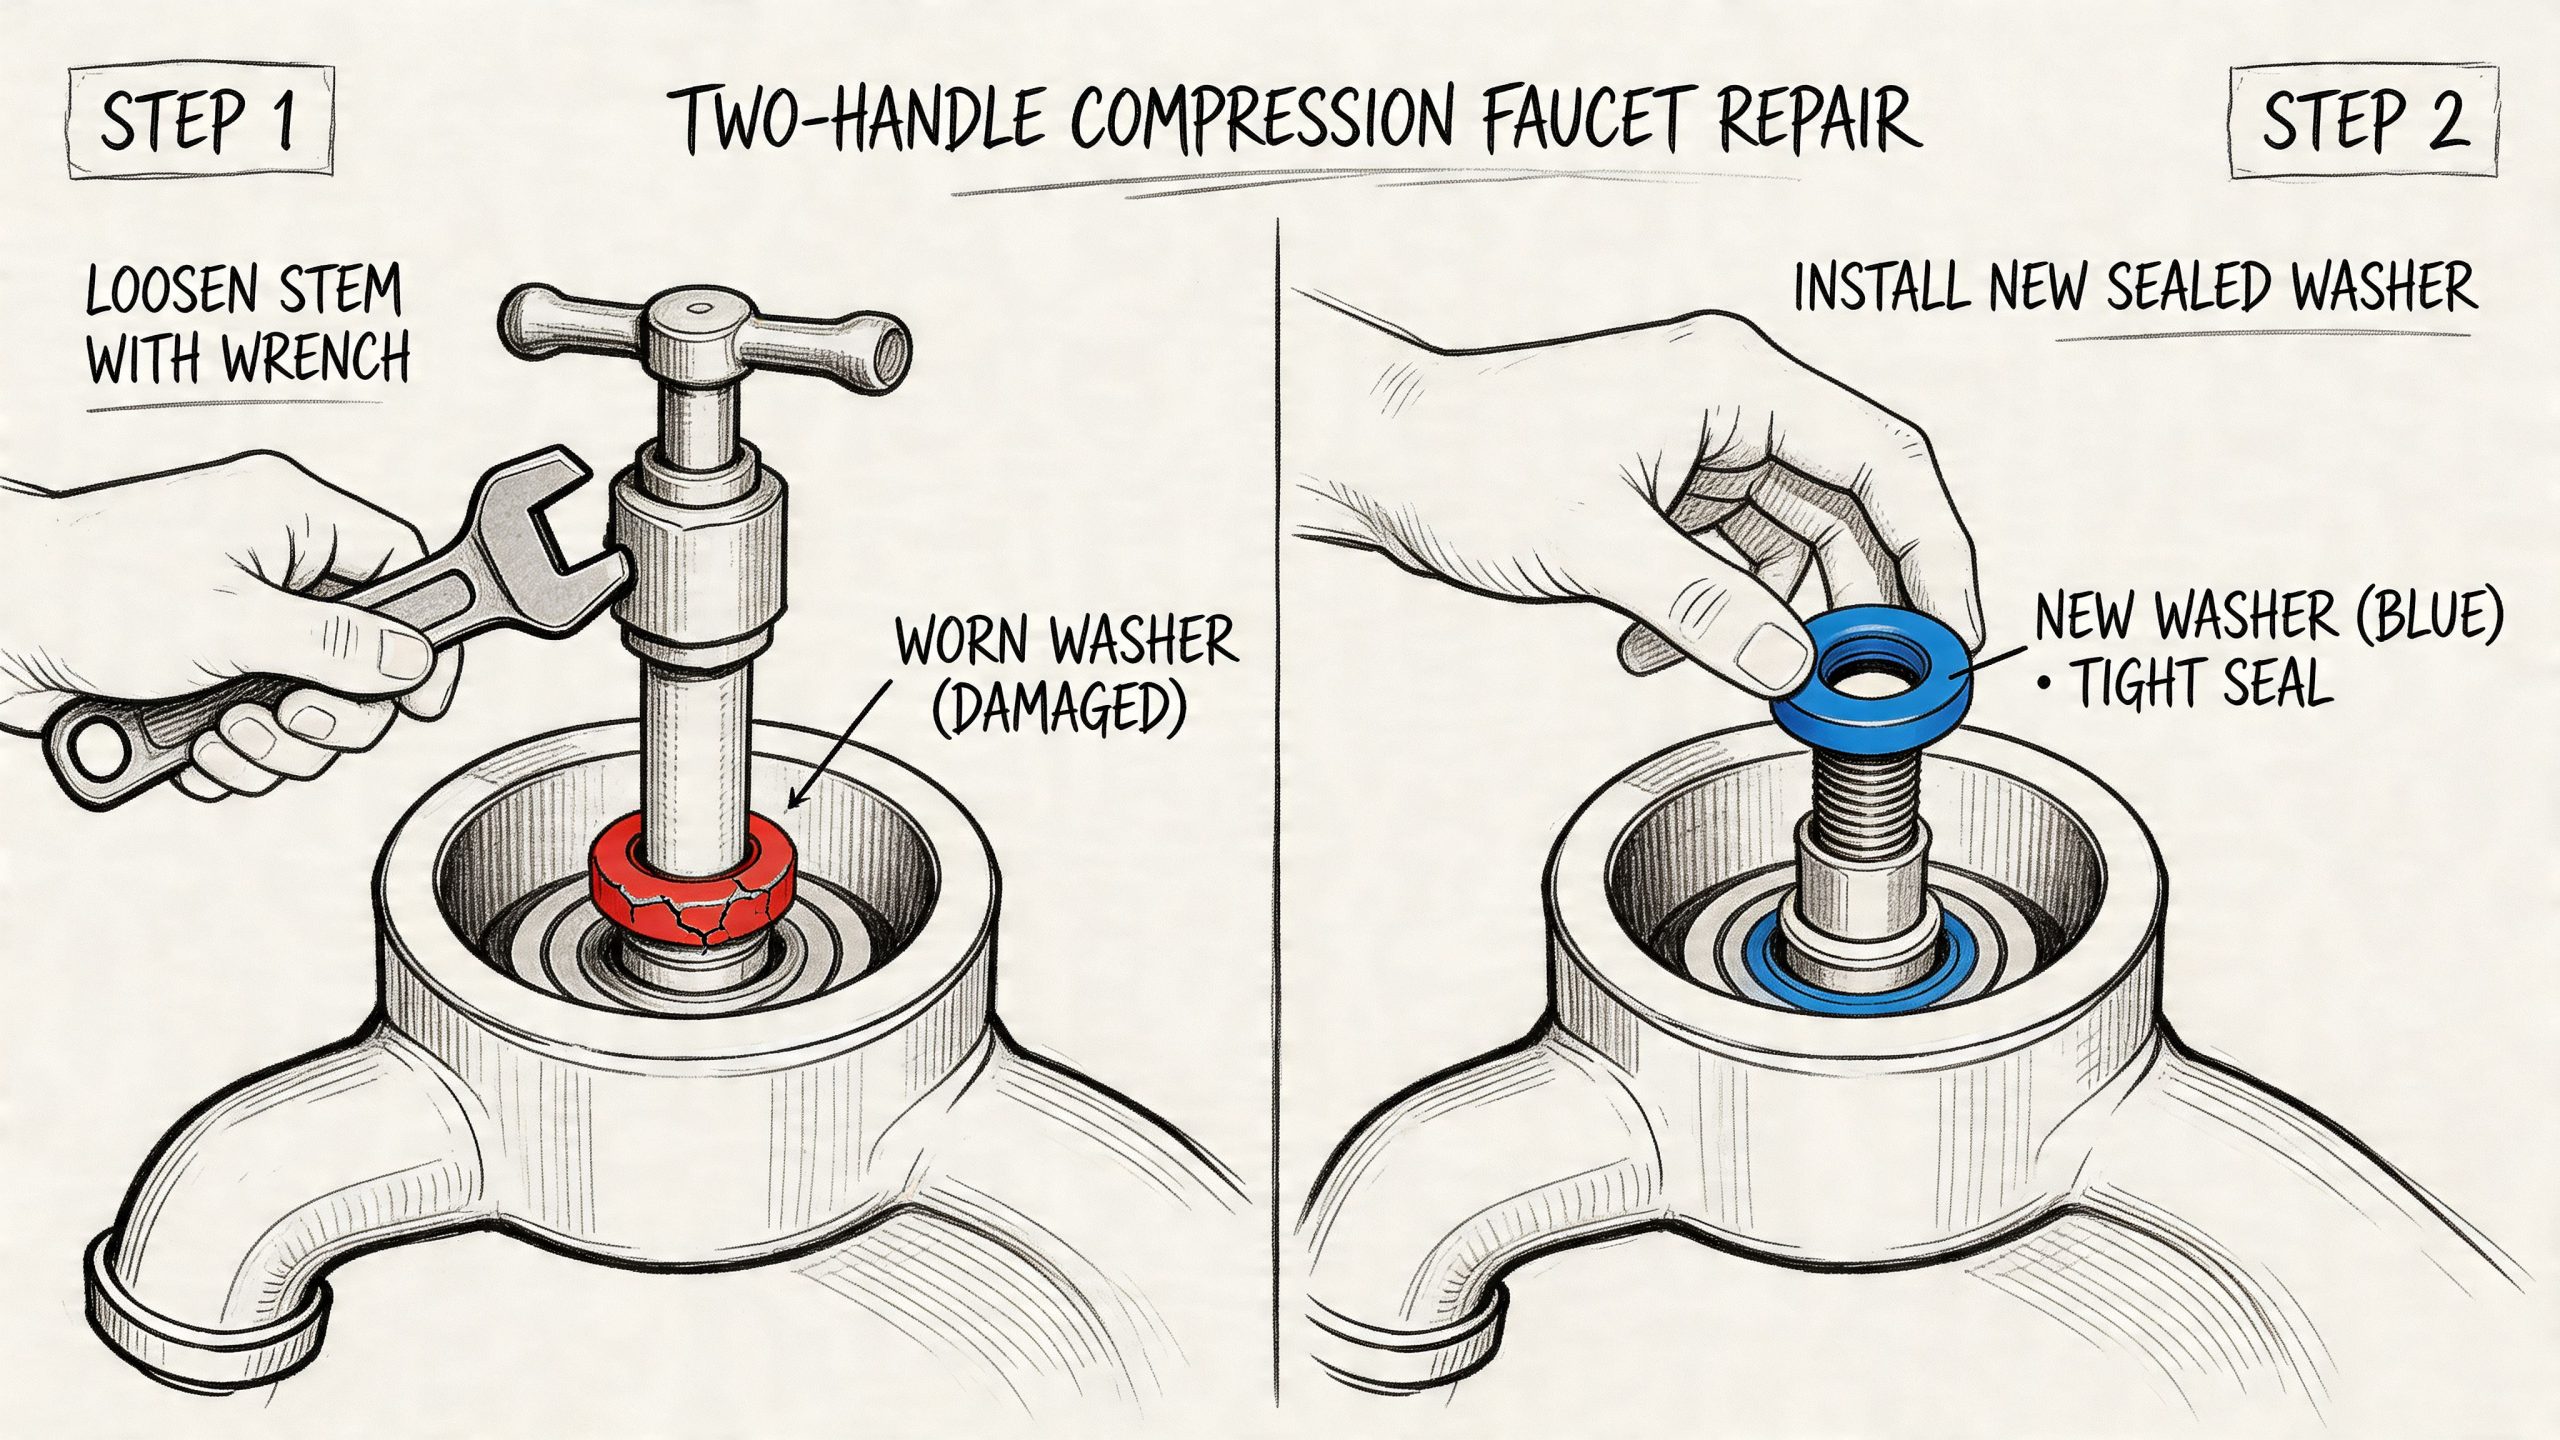
A lot of the time, the problem is the seat washer. For compression faucets, the primary drip culprit in 70% of cases is a worn rubber seat washer. Replacing it with a matched washer and properly lubricating O-rings reduces friction wear by 50% and has a 98% success rate for pros versus 75% for DIYers who follow the right steps, according to this compression faucet repair reference.
The repair sequence that works
Start with the water off at the stop valves under the sink. Open the faucet so any remaining pressure drains out. Then plug the drain with a rag. Small screws disappear fast.
From there:
- Pry off the decorative cap on the handle.
- Remove the handle screw with a Phillips screwdriver.
- Pull off the handle and set it aside.
- Loosen the packing nut with an adjustable wrench.
- Unscrew and remove the stem carefully.
- Find the rubber seat washer at the base of the stem.
- Remove the brass screw holding that washer in place.
- Install the matched replacement washer.
- Inspect the O-rings and replace them if they’re worn.
- Apply plumber’s grease to the O-rings before reassembly.
Why matching the washer matters
A washer that is close isn’t good enough. It needs to match the old one in size and profile. If it’s too thin, the drip can continue. If it’s too thick, the faucet may feel hard to close and wear itself out faster.
Bring the old washer to the store if you can. If the old one is damaged beyond recognition, bring the stem.
Don’t judge the repair by how the new part looks in your hand. Judge it by whether it matches the old part exactly where it seals.
Where DIY repairs go sideways
The most common mistakes are simple:
- Lost screws in the drain
- Overtightened packing nuts
- Reusing a flattened O-ring
- Installing the wrong washer
- Forgetting the order of parts on the stem
Overtightening is the big one. Homeowners often think tighter means better seal. On a faucet, tighter often means damaged threads, distorted parts, or a new leak around the handle.
What to check before you put it back together
Inspect the stem and the seating surfaces. If you see heavy corrosion, rough edges, or visible damage, a washer replacement may not be enough. The new washer can only seal as well as the surface it presses against.
You should also wipe away any debris or scale before reassembly. A tiny bit of grit can keep a repaired faucet from closing fully.
Test it the right way
Once the faucet is back together:
- Turn the water back on slowly
- Open the faucet gently
- Let it run briefly
- Shut it off and watch the spout
- Check around the handle and packing nut
If the drip stops, great. If the leak moves to the handle, the packing area or O-ring needs another look. If the faucet still drips from the spout, the issue may be a worn seat, a damaged stem, or a misidentified faucet type.
For homeowners who’d rather skip the trial and error, faucet repair and replacement service is one practical option when the stem is corroded, the fixture is aging out, or the leak comes back after a careful washer swap.
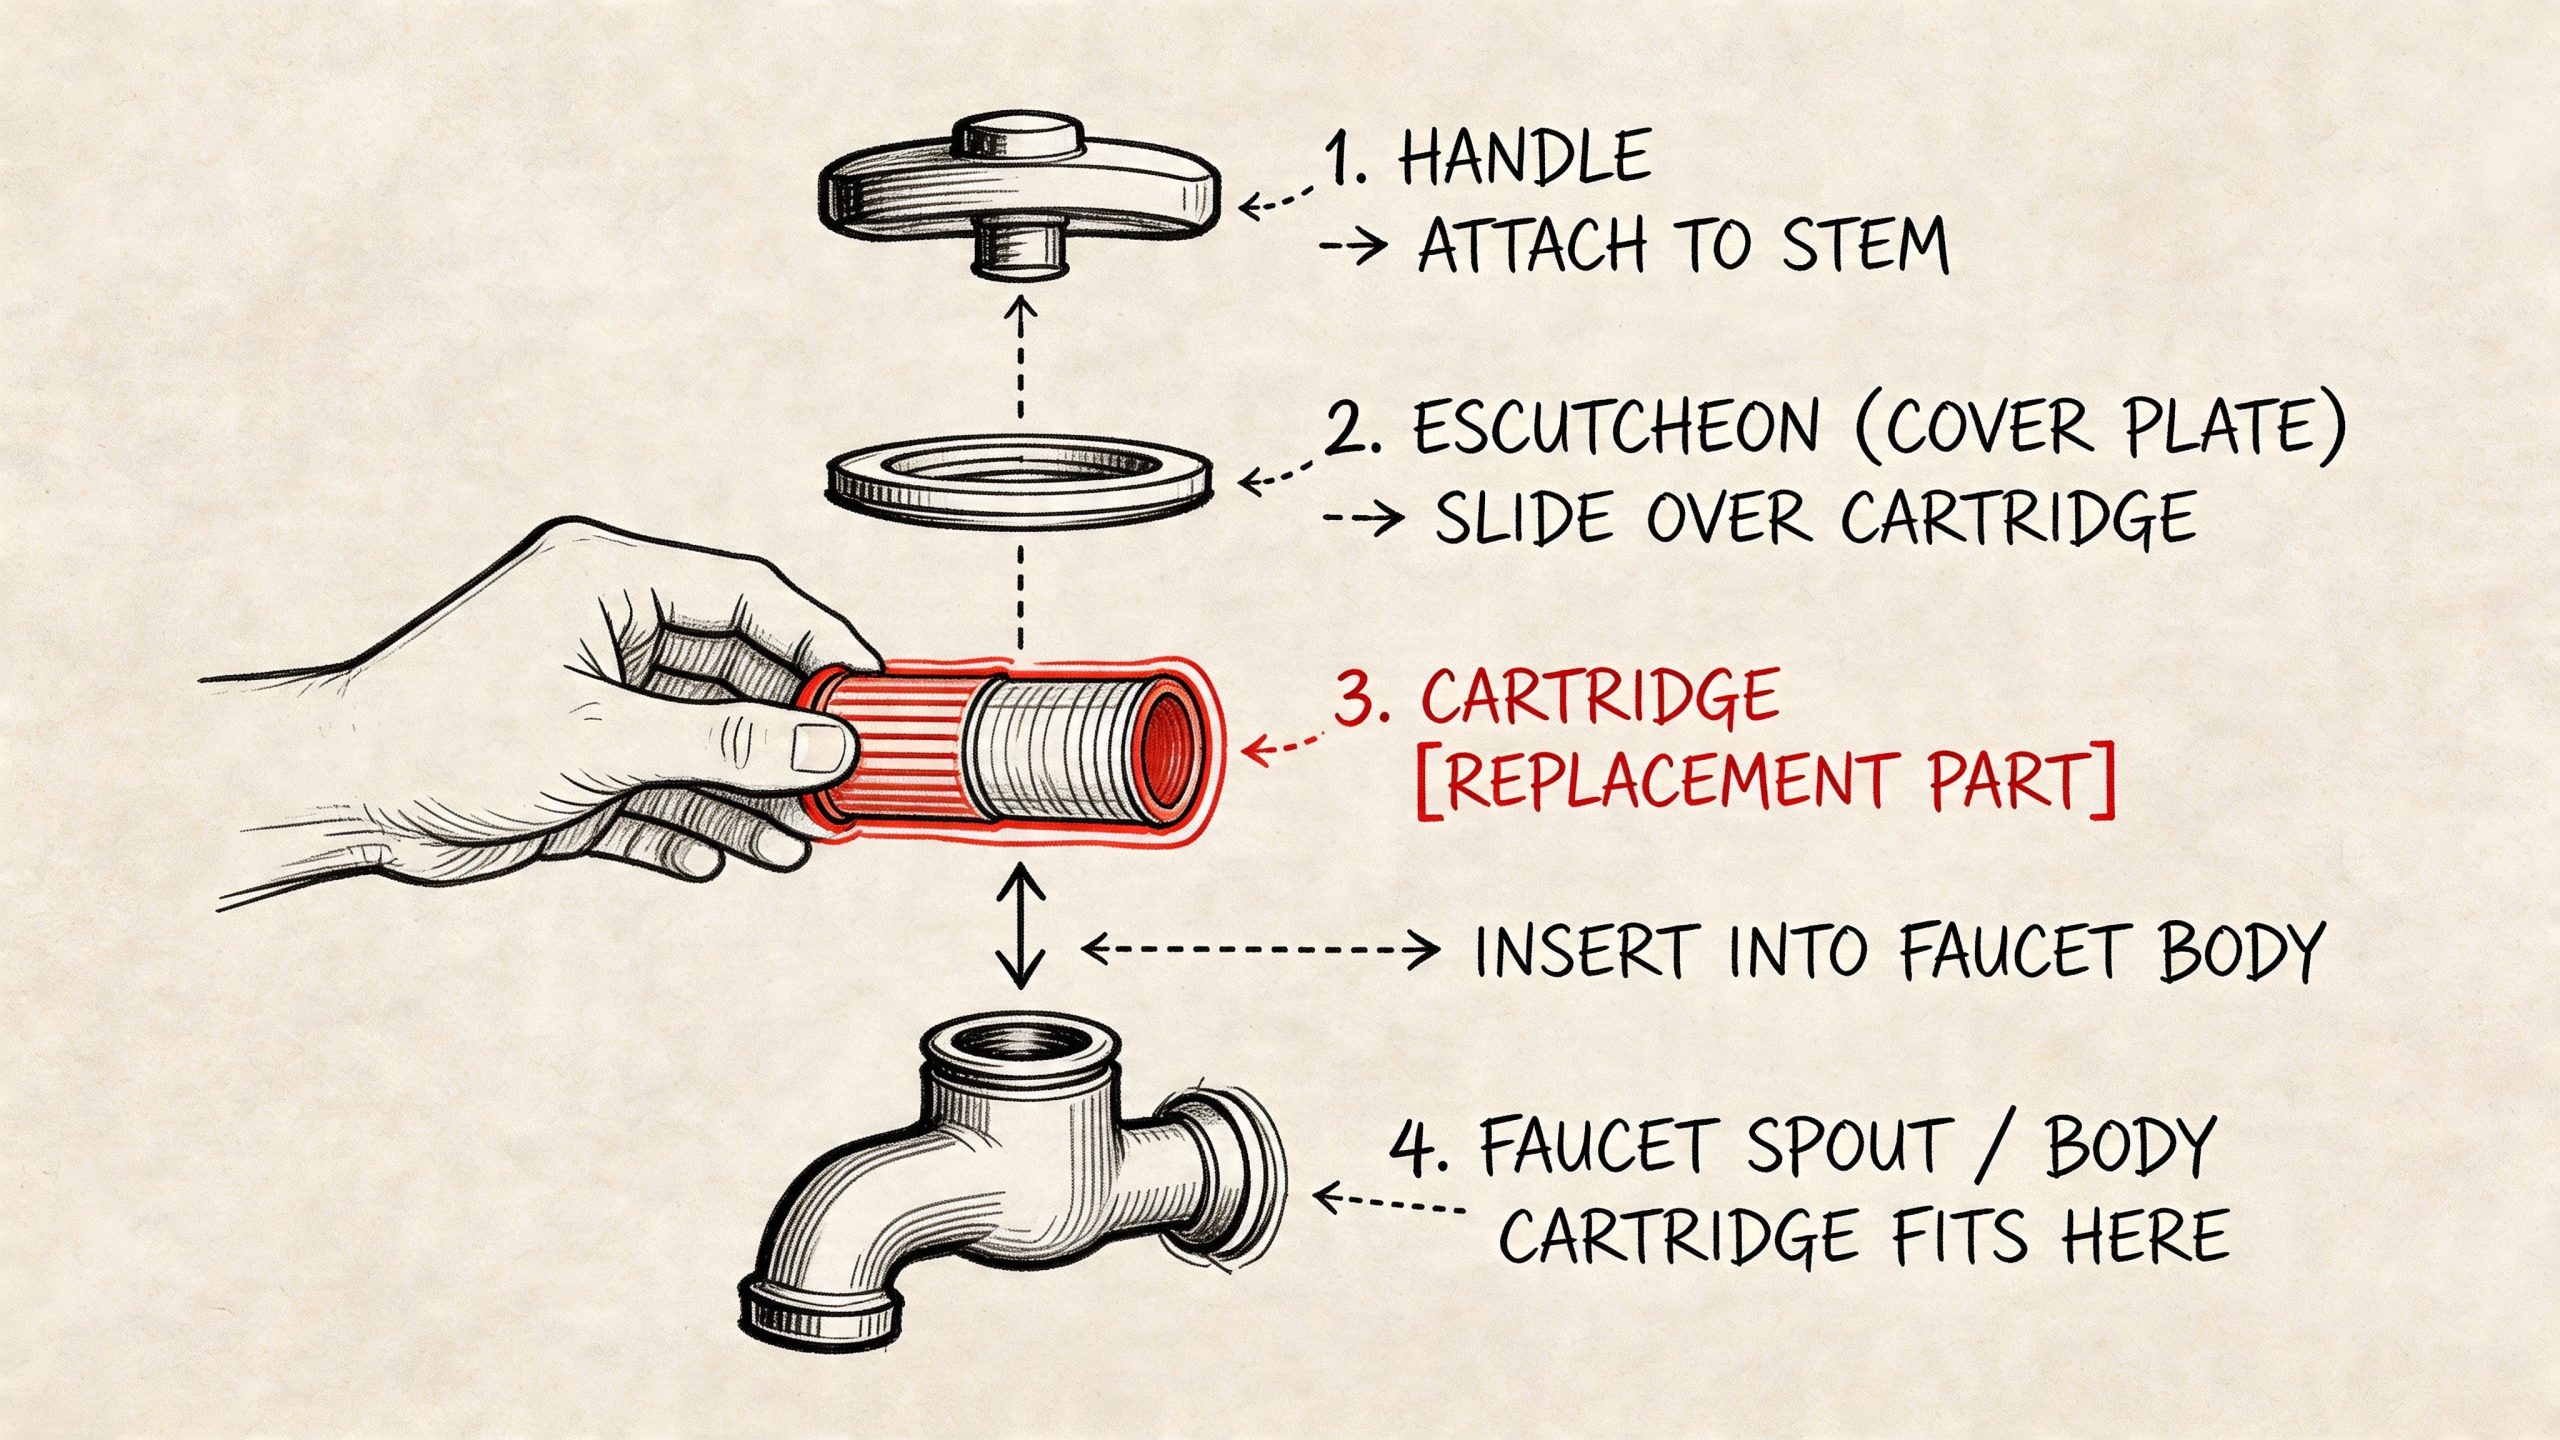
How to Replace a Leaky Faucet Cartridge
Cartridge faucets are common in newer homes, especially the single-handle styles you see in many kitchens and bathrooms around Alpharetta, Johns Creek, and Cumming. When they drip, the usual fix is replacing the cartridge, not tinkering with one small washer.
Cartridge faucets are in 60% of post-1990 US homes. DIY cartridge replacement has a 68% success rate, and high water pressure over 80 PSI is a factor in 15% of failures. Using OEM parts and addressing the underlying cause matters, and pairing the fix with water filtration in hard water areas can extend cartridge life 3x, based on this cartridge faucet repair guidance.
What makes cartridge repairs different
A cartridge has to go back in the correct orientation. That’s where many DIY jobs fail. The part may look symmetrical at first glance, but it often isn’t. If it goes in rotated the wrong way, the faucet may leak, reverse hot and cold behavior, or refuse to shut off correctly.
Before removal, study the cartridge position. Take a clear phone photo from above and from the side if the design allows it.
The clean replacement process
The sequence is straightforward if you stay organized:
- Shut off the water supply under the sink.
- Open the faucet to relieve pressure.
- Remove the handle by taking off the cap, set screw, or handle screw.
- Remove the retaining clip or retaining nut that locks the cartridge in place.
- Pull the old cartridge out carefully, noting its exact orientation.
- Clean the valve body cavity with a lint-free cloth.
- Install the new cartridge with fresh O-rings if included.
- Reassemble the handle and trim.
- Turn the water back on slowly and check operation.
Don’t skip the aerator and cavity check
Sometimes a faucet seems to have a cartridge problem when the underlying issue is poor flow from a clogged aerator. That won’t cause a drip from the spout by itself, but it can confuse the diagnosis.
The valve body also matters. If the cavity is cracked or heavily damaged, a new cartridge may not solve the leak. At that point, replacement of the faucet body becomes the more realistic path.
If the new cartridge goes in with resistance that feels wrong, stop and verify orientation. Forcing it is how handles break and retainers bend.
Why hard water and pressure matter in North Metro Atlanta
In many homes around Canton and Cumming, scale buildup is hard on cartridges. Mineral deposits scratch sealing surfaces, stiffen movement, and keep parts from seating cleanly. The leak you hear at the spout can start with water quality, not just age.
High pressure does the same kind of damage from a different direction. Instead of grinding parts down, it pounds them. If you replace a cartridge without correcting pressure problems, you may stop one drip and set up the next one.
A whole-home filtration setup can help reduce scale-related wear on faucets, water heaters, and other fixtures. That’s one reason homeowners look into systems such as HALO filtration when leaks keep repeating across multiple fixtures.
When a cartridge swap isn’t enough
Replace the faucet instead of the cartridge when you find:
- A cracked valve body
- A damaged retainer that won’t secure the cartridge
- Severe corrosion inside the faucet body
- A discontinued cartridge that can’t be matched reliably
- Repeated dripping after a careful OEM replacement
At that point, you’re not dealing with a simple internal refresh anymore. You’re trying to save a faucet that may already be at the end of its useful life.
Repairing Ball Type and Ceramic Disk Faucets
Ball and ceramic disk faucets aren’t repaired the same way, and they don’t fail the same way either. If you identify the wrong type, the fix gets frustrating fast.
Ball type faucets
A ball faucet usually has a single handle that pivots over a rounded cap. Inside, there are several small components that work together. When one of them wears out, the faucet can drip from the spout or seep around the handle area.
The most practical approach is to use the brand-specific repair kit if you can get it. Generic mixed parts can fit poorly.
For most ball faucets, the sequence is:
- Shut off the water
- Remove the handle
- Take off the cap and cam assembly
- Lift out the ball
- Replace worn seals and springs
- Inspect the ball for wear
- Reassemble in the exact order removed
If the ball itself is rough, scored, or visibly damaged, replacing only the seals may not stop the leak.
Ceramic disk faucets
Ceramic disk faucets tend to feel solid and smooth when you turn them. They usually last well, but when they leak, the issue is often debris or worn seals at the base of the cylinder.
The repair is usually shorter than a ball faucet repair:
- Turn off the water and remove the handle
- Take off the escutcheon or trim
- Lift out the ceramic disk cylinder
- Check and replace the lower seals if worn
- Clean out sediment from the body
- Reassemble and test
What separates a quick fix from a repeat leak
With both of these faucet types, cleanliness matters. Tiny debris left in the valve body can keep the new seals from seating properly. That’s why rinsing parts, wiping the body clean, and checking for scratches is worth the extra few minutes.
If the faucet body is cracked or the replacement parts feel loose even when matched correctly, it’s usually smarter to stop the repair and move to replacement.
A faucet can have new internal parts and still leak if the body that holds them is worn out.
When to Call an Emergency Plumber in North Metro Atlanta
A faucet repair becomes a professional job when the leak is no longer isolated, the fixture starts showing signs of deeper failure, or the symptoms point beyond the faucet itself.
According to this EPA-based local leak summary, 10% of U.S. homes have leaks wasting 90 gallons or more daily, and those ongoing issues contribute to a household average of over 10,000 gallons wasted per year. That matters because a faucet drip can be the visible symptom of a larger issue like high water pressure or pipe corrosion.
Signs the problem is bigger than the faucet
Call a plumber if you notice the drip along with any of these:
- Low water pressure across the house
- Water discoloration
- Leaks under the sink cabinet
- Repeated drips after careful part replacement
- Hammering or banging when fixtures shut off
- Water showing up in the yard
- Sewage smell, gurgling drains, or a sewer backup
- No hot water or signs of water heater trouble
A kitchen faucet drip by itself is one repair. A kitchen faucet drip plus low pressure and rust-colored water is a diagnostic problem that may involve the water line, pressure regulation, or the water heater.
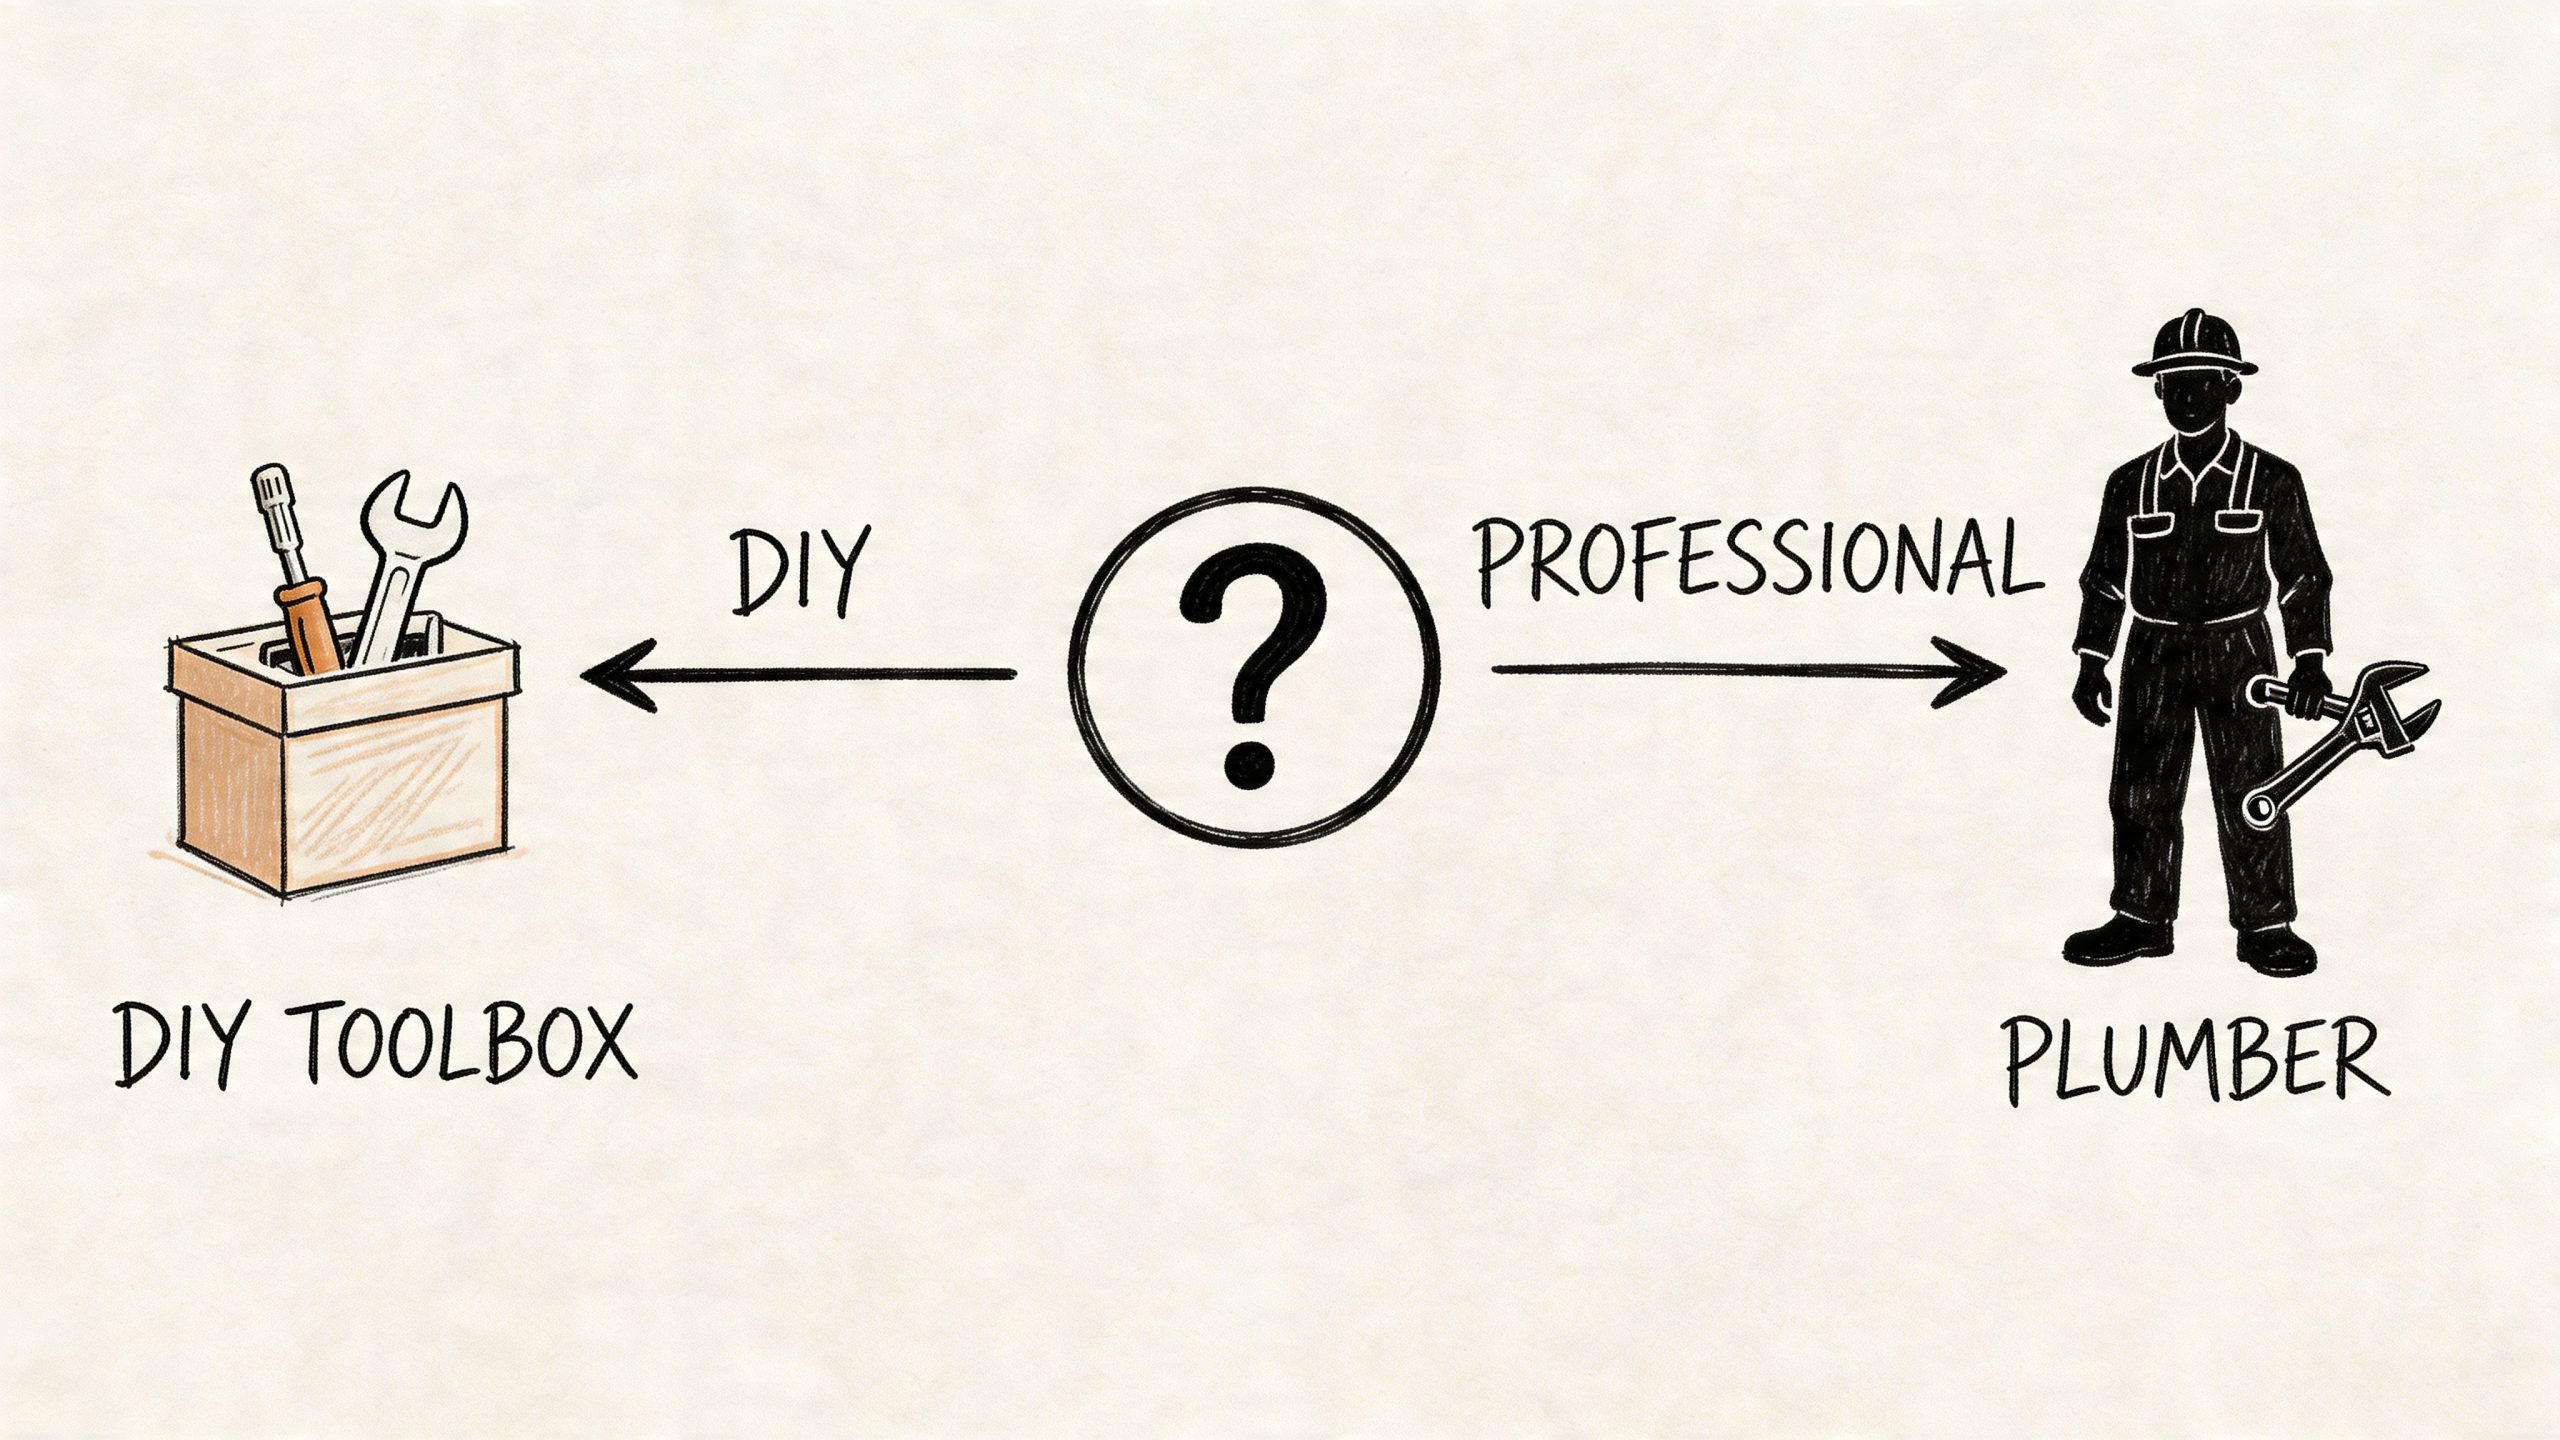
The repair versus replace decision
Some faucets are worth repairing. Some are parts-hungry time traps.
A repair makes sense when the body is sound, the parts are available, and the leak source is clear. Replacement makes more sense when the fixture is heavily corroded, the cartridge or stem is hard to match, or the faucet has already had repeat repairs.
That same logic applies across the house. Homeowners searching for water heater replacement Woodstock, drain cleaning Acworth, main water line repair near me, sewer repair Marietta, or burst pipe repair Roswell are often dealing with a symptom chain, not one isolated problem.
Why emergency service matters
A faucet that won’t stop dripping after you’ve shut the handles off can sometimes be managed until morning. A shutoff valve that fails under the sink, cabinet water spreading into flooring, or pressure problems affecting multiple fixtures shouldn’t wait.
If you’re in Cobb County, Cherokee County, North Fulton, or Forsyth County and you need a 24 hour plumber, an emergency plumber near me, or help with clogged toilet won’t flush, sewer replacement, or water line replacement, the value isn’t just faster arrival. It’s getting a diagnosis that separates fixture trouble from system trouble.
For homeowners comparing repair choices during a broader kitchen refresh, it can help to look at how remodel professionals think about fixture integration, access, and finish coordination. A useful example is this guide to professional kitchen upgrades in Victoria, which shows how plumbing decisions often tie into cabinet layout, sink selection, and long-term usability.
When I’d tell a homeowner to stop DIY and pick up the phone
These are the moments:
- The drip survives two careful repair attempts.
- The shutoff valves under the sink don’t fully close.
- The faucet body shows cracking or serious corrosion.
- You’re seeing multiple plumbing symptoms at once.
- The leak is causing active damage to cabinets, flooring, or drywall.
At that point, you’re not saving time by continuing. You’re gambling with a bigger repair.
If you need urgent help for a faucet leak that turns into cabinet flooding, a failed shutoff, or a broader whole-house issue, emergency plumbing service in North Metro Atlanta is the kind of call that makes sense before the damage spreads.
Prevent Future Drips and Keep Your Plumbing Healthy
A successful faucet repair is good. A repair that lasts is better.
Most repeat drips come from the same handful of issues. Wrong replacement parts, rough handling during assembly, hard water scale, or pressure that keeps beating up internal seals. If you want to stop dripping faucet problems from coming back, prevention has to be part of the plan.
Habits that extend faucet life
- Use a light hand: Don’t crank handles down to force a seal.
- Fix small stiffness early: A handle that gets harder to turn usually means buildup or internal wear.
- Watch for repeat symptoms: If more than one faucet starts acting up, think beyond the fixture.
- Keep the aerator clean: It won’t solve every leak, but it helps you read faucet performance more accurately.
Protect the plumbing system, not just one faucet
Pressure control matters more than most homeowners realize. Excess pressure can be rough on faucets, supply lines, toilet fill valves, and appliance connections. If your house has a history of leaks, checking the pressure reducing valve is a smart next move. This overview of PRV and water pressure solutions is useful if you suspect pressure is wearing out fixtures faster than it should.
For landlords and owners of multi-unit properties, prevention is even more important because small plumbing issues repeat across several sinks, tubs, and toilets. The broader point in this article on the importance of rental property upkeep applies here too. Routine maintenance prevents small fixture issues from becoming vacancy, damage, or turnover problems.
A faucet drip is easy to treat as a one-part repair. In a lot of homes, it’s really a maintenance signal from the whole plumbing system.
If you’re also dealing with slow drains, no hot water, a sewage smell, low water pressure, water in the yard, or a clogged toilet that won’t flush, it’s worth addressing those symptoms together instead of one at a time. That’s often how homeowners avoid repeat service calls and finally get to a lasting fix.
Need help beyond a faucet repair? JMJ Plumbing serves North Metro Atlanta with residential and commercial plumbing, including drain cleaning, leak repair, sewer repair and sewer replacement, water line replacement, main water line repair, water heater replacement, burst pipe repair, and 24-hour emergency plumbing. If you’re in Woodstock, Acworth, Alpharetta, Canton, Roswell, Marietta, Cumming, or Johns Creek and need a clear diagnosis, online booking, or current coupon options, reach out before that small drip turns into a bigger problem.